Every keyboard irrespective of its make or model comes embedded with a set of unique keys to provide you quick access to certain functions or features.
Want to adjust display brightness or turn up or down your system volume? Just press a key on your keyboard, and its done. Sounds easy? That’s what the Function keys on your keyboard enable you to do. They also double up as multimedia keys and make it easier for you to control several functions that you could otherwise only control through system settings or by moving your cursor. Accessing these functions requires you to use (F1~F12) keys in combination with the Fn key.
Wouldn’t it be much more convenient if you can just use Function keys without having to press the Fn key in conjunction? That’s what we’ll learn to do today. If you do not prefer pressing the Fn key each time to access function keys, you can lock it permanently.
Going forward, we will illustrate two simple methods to lock and unlock the Fn key at your convenience. But before we tell you how to do that, let’s first learn more about Fn Key.
Fn Key: What is it, and where can you find it?
Fn is an abbreviation for function. You can generally find it on the bottom left side of your keyboard between the Ctrl, Alt, and Windows key.

Similar to other modifier keys like a Shift key, the Fn key allows you to access the second assignment of a key. Using Fn key in combination with function keys like F1, F2 & more on your keyboard, you can perform additional functions associated with those keys. The tasks linked to the F1~F12 keys depend on the manufacturer and your computer’s model. Sometimes those may even rely on the type of keyboard.
Mentioned below are some of the most common functions available on keyboards with Fn combination:
- Adjust the display brightness level
- Switch between windows
- Increase or reduce system volume or mute it altogether
- Play, pause, fast forward, and rewind media
- Enable laptop standby mode or put your computer to sleep
- Turn on or off your screen
How to Lock and Unlock the Fn Key
Method 1: Lock or Unlock the Fn key through BIOS or UEFI Settings
The Fn key can be enabled or disabled from BIOS. Disabling (locking) Fn key will change dual-use keys that need pressing Fn into single-use. However, disabling Fn through this method requires your system to have advanced BIOS options.
To change Fn settings from the BIOS Setup Utility, follow the steps mentioned below:
- First, identify the key that takes you to your BIOS settings. Those keys vary depending on your laptop. To enter Bios Setup Utility in Dell or Acer laptops, use the F2 key. Similarly, for HP laptops, use F10. For ASUS laptops, use Del and for Lenovo use F1 or F2.
- Switch on your computer, and while the system is booting, immediately press the key that opens up BIOS settings on your computer.
- If you miss the boot window and the laptop continues to load, switch off your computer and turn it on again.
- Next, using the right or left arrow key, enter the System Configuration menu.
- Under it, using the down arrow key look for the Action Keys Mode option. From here, you can enable or disable the Fn key. If enabled, you need not press the Fn key to access functions printed on (F1~F12) keys. If disabled, you need to press the Fn key to use functions on printed on (F1~F12) keys.
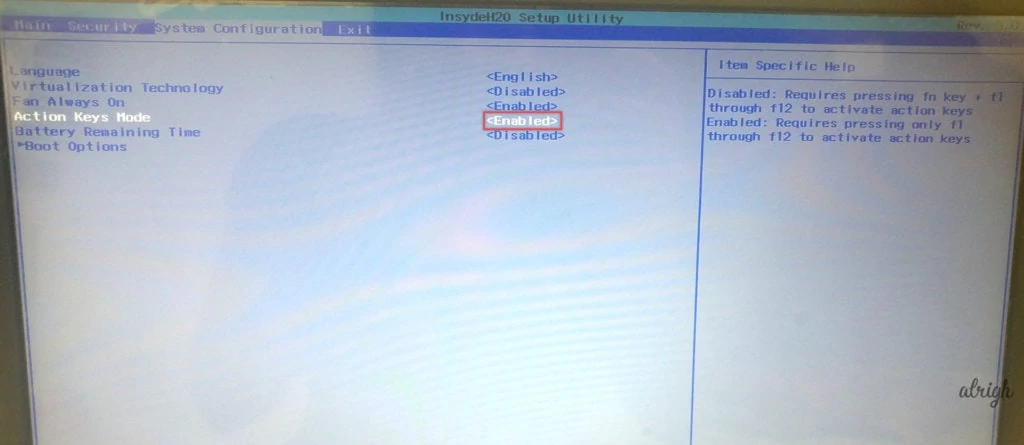
Note: On some laptops, the function key may be available under the Main or Advanced options.
In addition to the method mentioned above, you can also lock or unlock the Fn key through UEFI settings. So, if you cannot enter BIOS, resort to this method.
- Open the Start menu and type Settings in the search bar.
- Click on Settings. From the settings screen, select Update & Security.
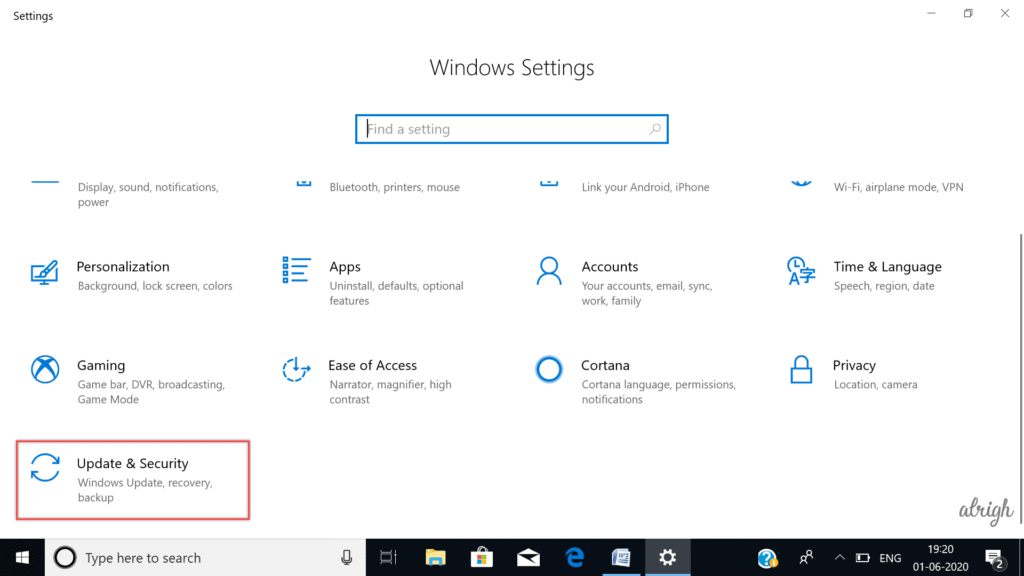
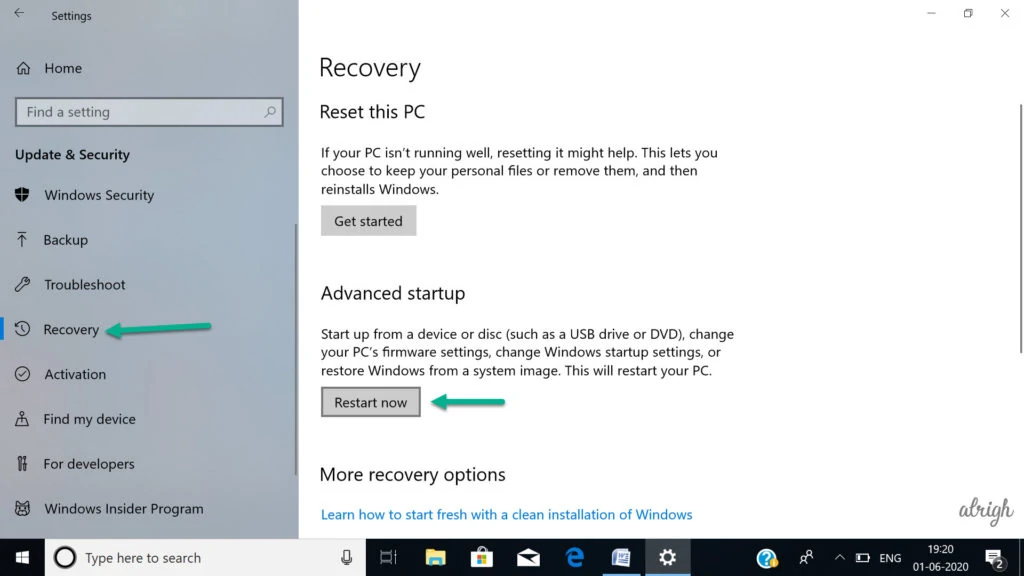
- Next, select Recovery, which is present on the left. Under Recovery, select Restart Now. Your laptop will restart and open up the UEFI settings.
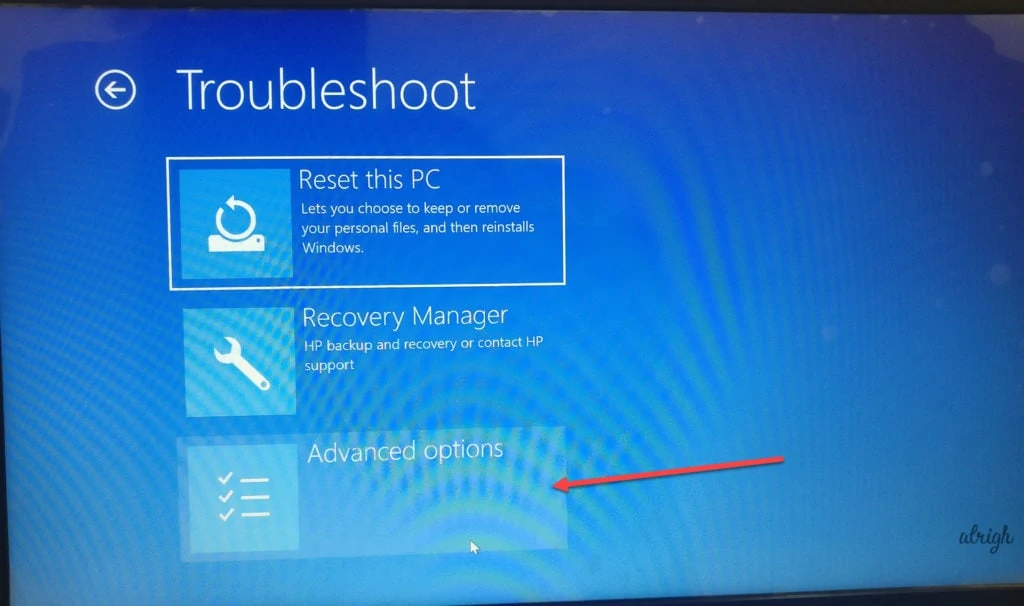
- From the pop up display select Troubleshoot options > Advanced Options > UEFI Settings.
- To change UEFI settings, click the Restart button.
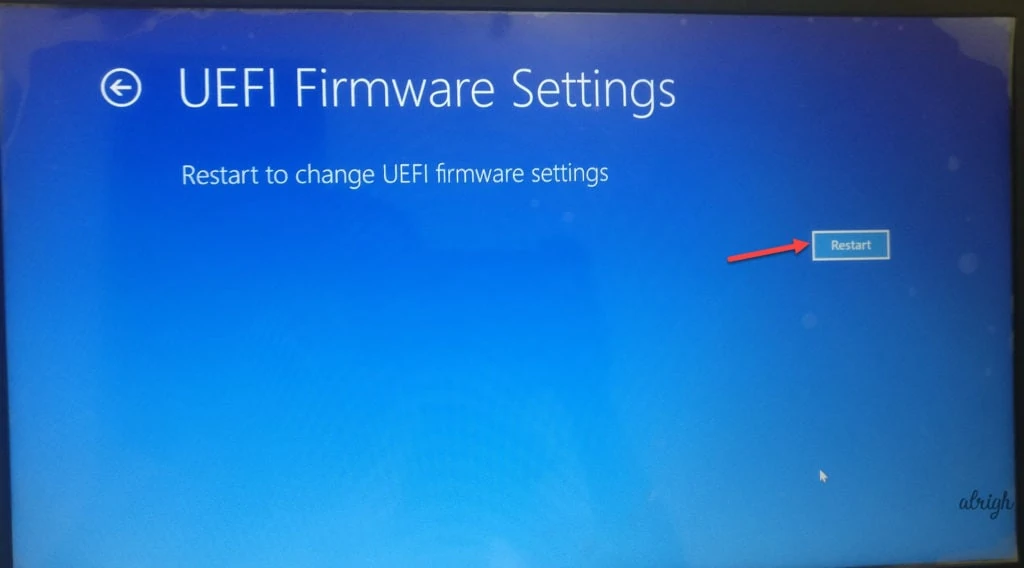
- Now your laptop will restart and take you to BIOS from where you can lock/unlock the Fn key as required. However, depending on your laptop model, you can locate Fn key either under Main, Advanced, or System Configuration options.
- Once done, hit Enter to lock/unlock function key settings.
Method 2: Use Keyboard Settings
Using your keyboard settings is the fastest way to lock or unlock the Fn key. If you have an Fn lock key, you can press it in conjunction with the Fn key to lock Fn keys and vice versa to unlock it.
Generally, the Fn lock key is represented by a lock symbol and is present under the Esc (Escape) key. If you can’t find it under the ESC key, search if it is there elsewhere. Some keyboards may not have the Fn key at all. To enable or disable the Fn key, repeat this process as and when required.
Furthermore, to unlock the Fn key, you can try one of the following key combinations:
- Ctrl + Shift + Num
- Number
- Fn + Num
- Num + F11
- Fn + F11
If your keyboard does not come with a Num key, you can try these shortcuts in combination with Ins (Insert) key.
Final Thoughts
Following these methods will enable you to use Function keys (F1~ F12) without pressing the Fn key. So, now you can enjoy complete peace of mind. As locking Fn key will ward off your worries of triggering the wrong function in case of missing Fn keypress. However, the process to lock/unlock the Fn key will vary depending on your keyboard or laptop model. If all else fails, run your eyes over your laptop’s configuration panel details and then scroll through the internet to find the process for your laptop model.

I was hoping on locking the FN key so I didnt have to hit the damn thing every time I wanted to hit F2 or F3 when lowering or raising my volume levels when playing music. what a BITCH! so fuck it. my husband’s being an asshole and not helping. STUPID DESKTOP SHIT!