“Windows update cannot currently check for updates, because the service is not running. You may need to restart your computer.”
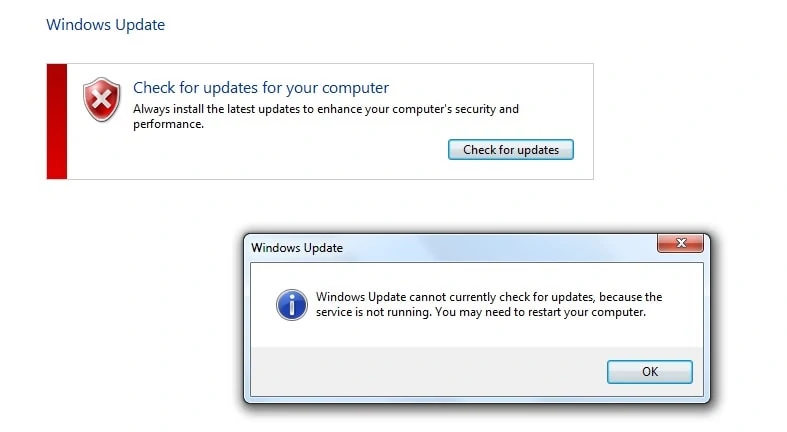
You might run into this error while checking for Windows updates on your PC. Because of this, you won’t be able to keep your system up-to-date.
Not having an up-to-date Windows system can make your PC vulnerable to malicious attacks and viruses. So, you must fix the Windows update service to keep your PC safe.
Note: If you’re running Windows 7 or below, these steps won’t apply to you. As of January 14, 2020, Microsoft has stopped support for Windows 7. So, you won’t receive any updates, unless you’re running a business and pay Microsoft for updates. More on that here.
Today we have searched and compiled all the working fixes for the windows update service.
What Causes the Windows Update Service to Not Run?
But wait, why is my Windows update service not running? Is it something I did? Well, not necessarily. Operating Systems are trick pieces of software, many things could cause the Windows update service to stop running. To list a few:
- Intel Rapid Storage Technology Driver is outdated.
- Your antivirus software is interfering with the Windows Update Service.
- Your device drivers are outdated.
- Windows Update repository needs to be reset
- Windows Update service is missing.
There are a bunch of other things that could cause this issue, including a lot of unknown variables.
How do I Fix Windows Update Service is not running?
Now that we’ve discussed what could potentially cause the Windows update service to stop running, we can discuss how we can make the Windows update service to run properly.
Over the internet, many people have claimed that many different ways have helped them fix this issue. We have gone through all of them and compiled what we believe are the most practical and working solutions to this issue.
So, you can go through this list and try these fixes, till one of them works for you.
Solution 1: Troubleshoot the Windows Update Service
Luckily for us, Microsoft knows this issue can occur. So, Windows has an inbuilt troubleshooter specifically for issues surrounding the Windows Update Service.
You can easily access it and fix the issue through the troubleshooter.
To access the Windows Update Troubleshooter, follow these steps:
- Press the Windows key to access the start menu.
- Type in, “Troubleshoot settings” and then press Enter.
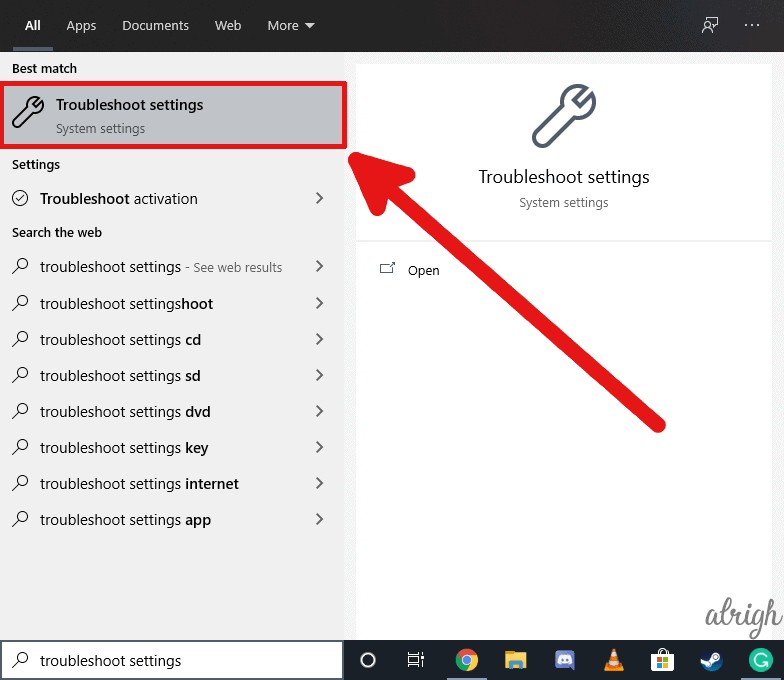
- Scroll down and click in Windows Update under Get up and running.
- Now, click on Run the troubleshooter.

- A window will open and start scanning for problems.
If you let the troubleshooter do its thing, it should (fingers crossed) be able to fix whatever issue was interfering with the Windows update service.
But if for some reason, the windows update troubleshooter is not able to identify or fix the problem, you can continue reading to see if any other fix on this list works for you.
Solution 2: Clear the Software Distribution Folder to Restart the Windows Update Service
Sometimes corruption in the software distribution folder can cause the Windows update service to act up. The Software Distribution folder contains temporary files for Windows Update.
If we delete the folder, the Windows update service will restart, hopefully fixing any issues you may be encountering with it.
To restart the Windows update service, follow these steps:
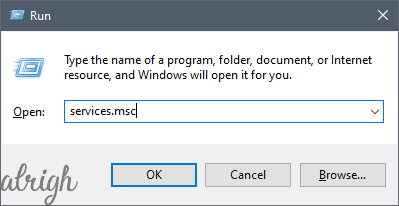
- Press the Windows key + R to open the run window.
- Type in, “services.msc” into the dialogue box and press Enter.
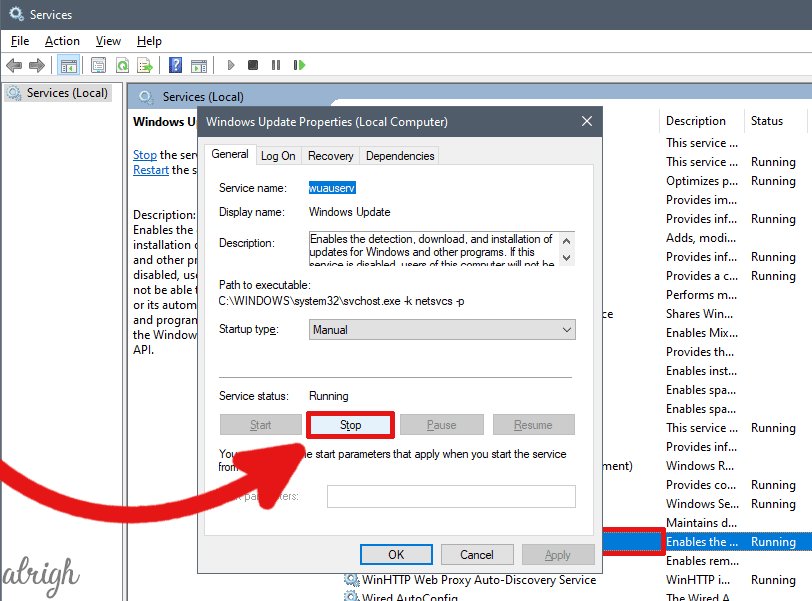
- Scroll through all the services and find “Windows Update”.
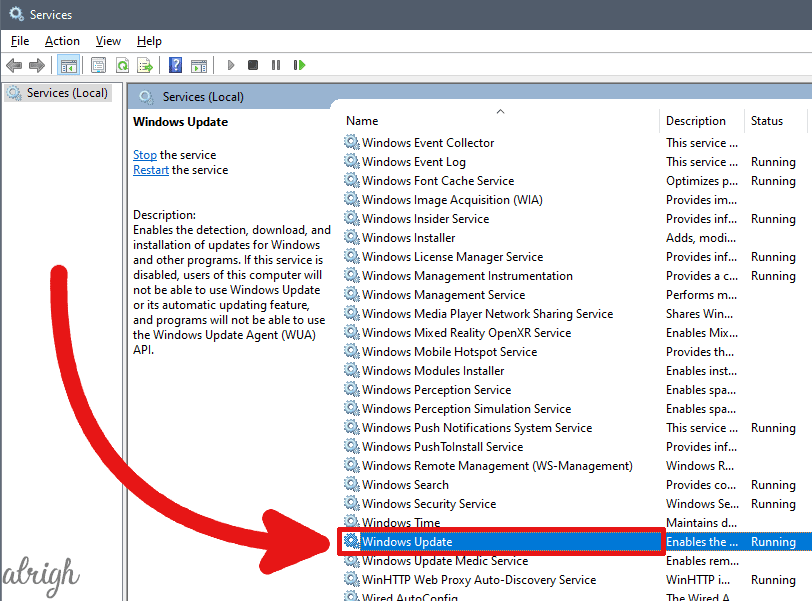
- Once you find it, double-click on it and make sure it isn’t running.
- If it is running, you can click on the Stop button to stop it.
Now you can delete the Software Distribution folder.
- Press the Windows key + E to open up the File Explorer.
- Go to This PC > Local Disk C (or wherever your Windows is installed) > Windows > SoftwareDistribution
- Select all the files and folders here.
- Right-click on them and then select Delete.
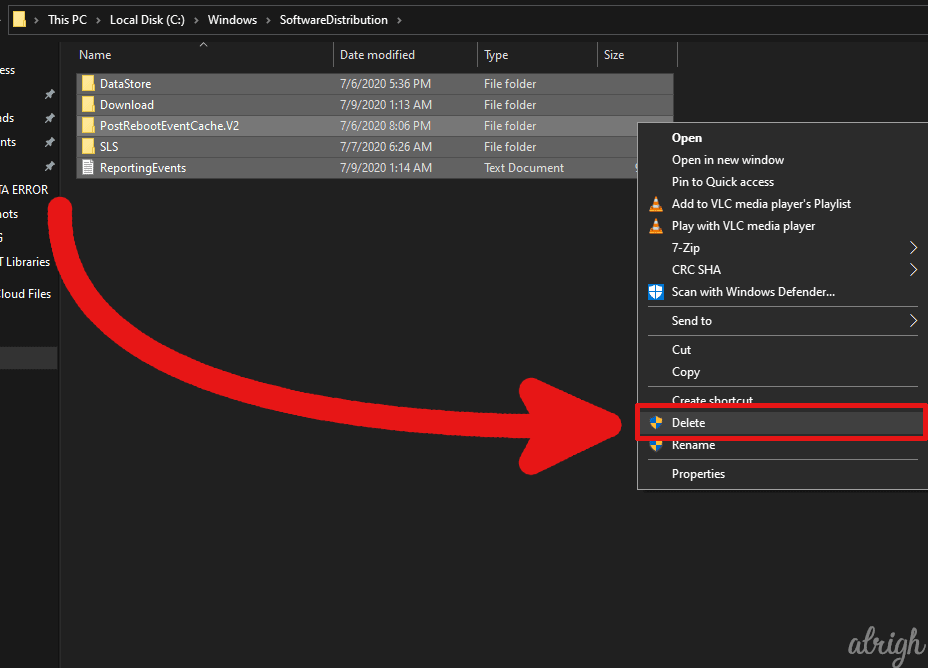
- Windows might ask you for admin privileges.
Once you’ve deleted all the files you can restart the Windows Update Service.
- Press the Windows key + R to open the run window.
- Type in, “services.msc” into the dialogue box and press Enter.
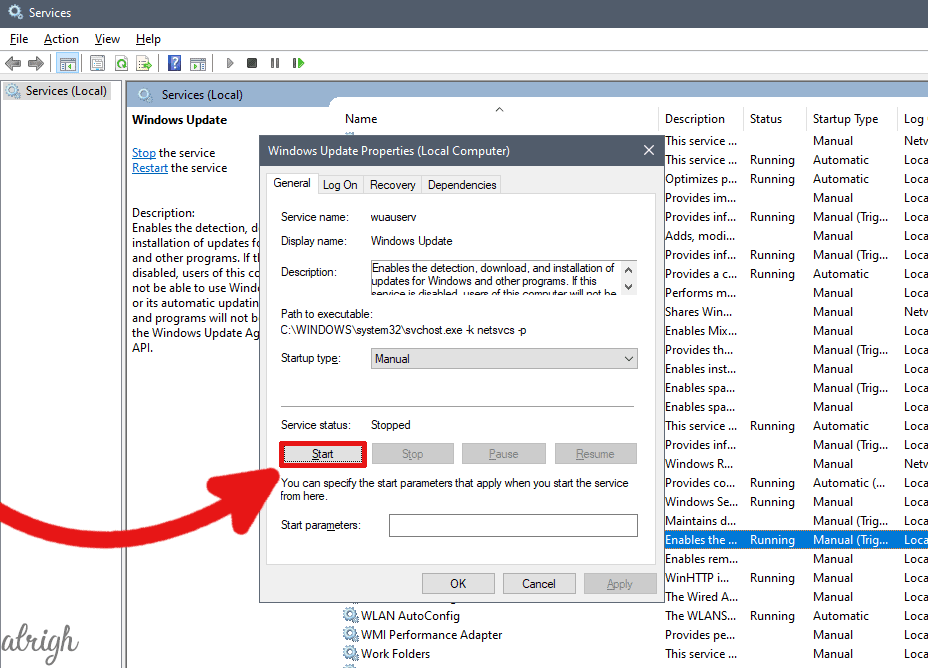
- Scroll through all the services and find “Windows Update”.
- Once you find it, double-click on it.
- Now click on the Start button to restart the Windows Update services.
Now go back and try to run Windows Update, hopefully, it should now open properly.
If it doesn’t work, don’t get disheartened yet! There are still a few ways you could fix this issue, keep reading!
Solution 3: Install the latest Intel Rapid Storage Technology Drivers
The 3rd solution that seems to work for most people is installing the latest version of the Intel Rapid Storage Technology Drivers (RST).
To be completely honest, I’m not sure what the link between Windows Update and Intel’s storage drivers is. But many people have reported that installing the drivers has fixed the issue.
You can go to this link to install the Intel Rapid Storage Technology Drivers (wow that’s a mouthful).
Make sure to filter by your operating system from the drop-down list.
The file is rather small, so it might take a few seconds to download depending on your internet connection.
After downloading the RST setup file, run it as an administrator. After the setup runs, restart your PC and try to run the Windows update service again.
Hopefully, this fixed the issue. If it didn’t, keep on reading.
Solution 4: Run a Virus Scan
Sometimes a virus or some other malicious software could be interfering with the Windows update service. In this case, you should run an anti-virus scan as quickly as possible to find and remove the virus.
If you’re on Windows 8 or above, you can use Windows’ built-in virus and threat protection software to check for viruses or suspicious software.
If you’re using Windows 7 or below, let me remind you support for those operating systems has been discontinued. So, unless you’re paying Microsoft for support, you won’t be getting Windows updates.
With that out of the way, for those of you running Windows 10, follow these steps to run an anti-virus scan:
Note: steps for Windows 8 & 8.1 should be similar. You can ask Google for help if you can’t find it.
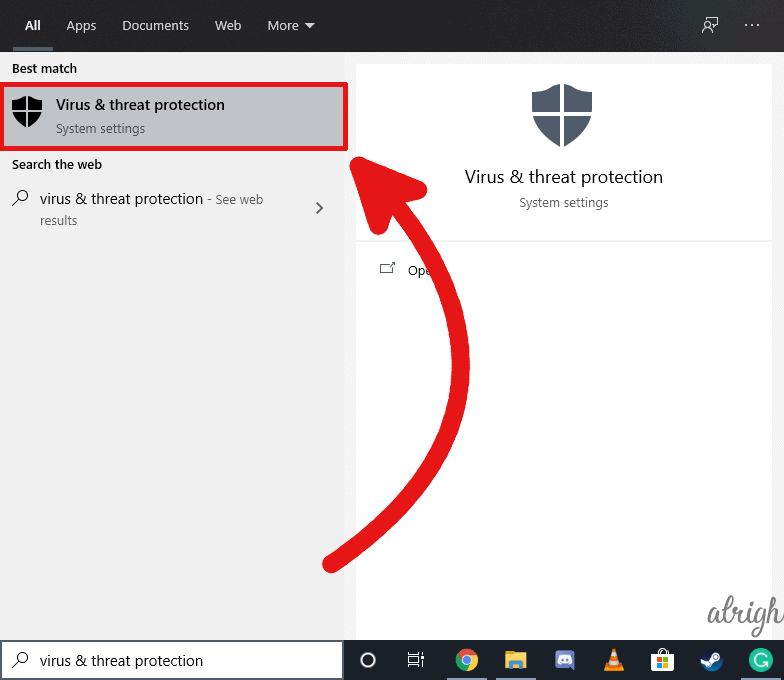
- Press the Windows key to access the start menu.
- Type “Virus & threat protection” and press Enter.

- Click on Scan options
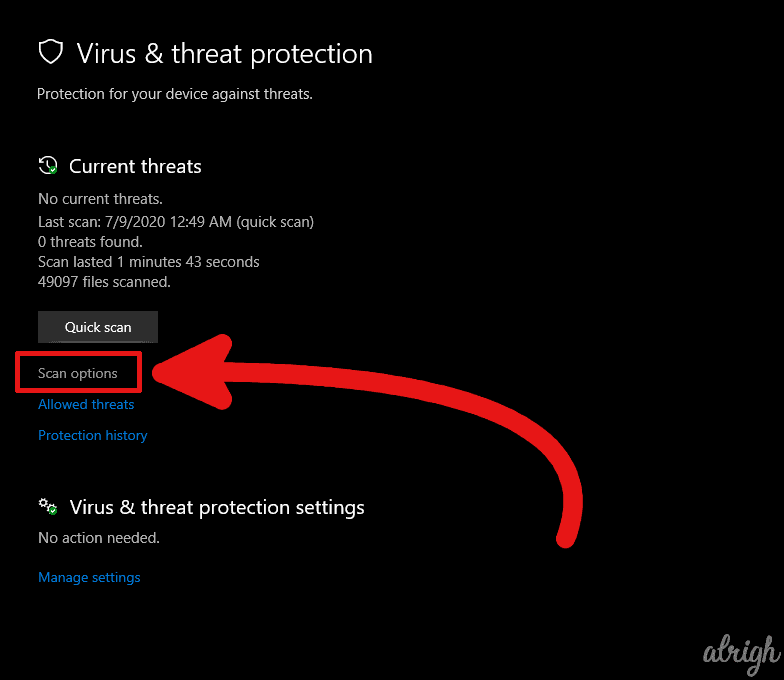
- Select Full Scan from the list of options and then click on Scan now.
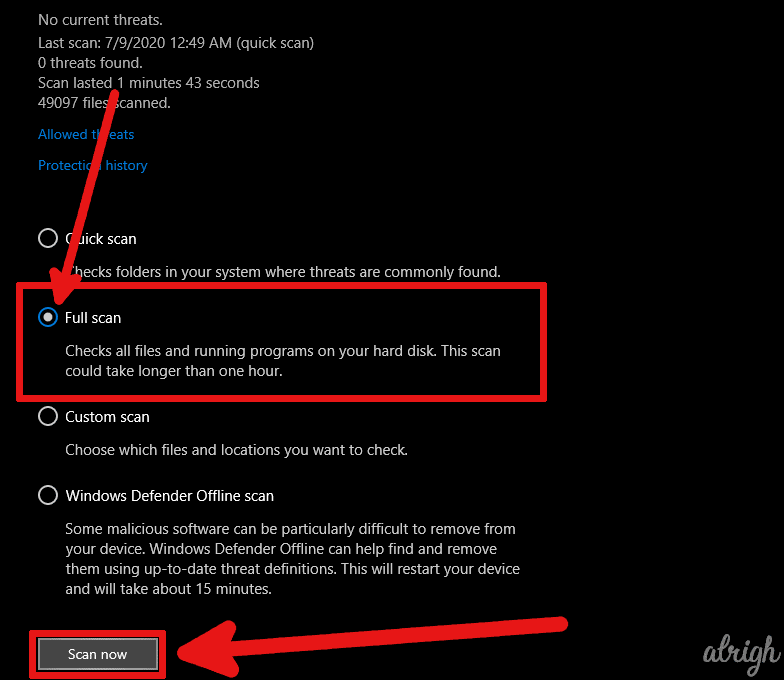
This should initiate an anti-virus scan. Because this is a full system scan, it might take a while. Anywhere from 20 minutes to an hour or more. It all depends on your storage device’s read/write speeds, so be patient.
Once the virus scan completes, you can restart your system and try to run the Windows update service again.
Solution 5: Turn off real-time protection temporarily
It is very unlikely that Windows’ own anti-virus software is interfering with the Windows update service.
But if you’re running a third-party anti-virus software, it could interfere with Windows update services.
You can try to temporarily turn off the real-time protection of said anti-virus to see if that fixes the issue.
To give you an idea, this is how you can temporarily turn off the real-time protection on Windows 10’s built-in anti-virus software:
- Press the Windows key to access the start menu.
- Type “Virus & threat protection” and press Enter.
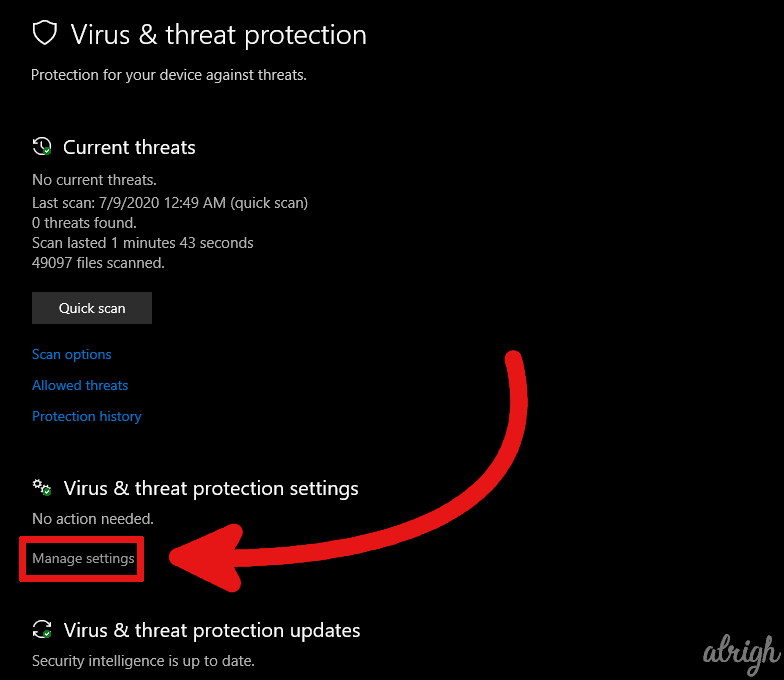
- Under Virus & threat protection settings click on Manage settings.
- Now turn off Real-time protection.
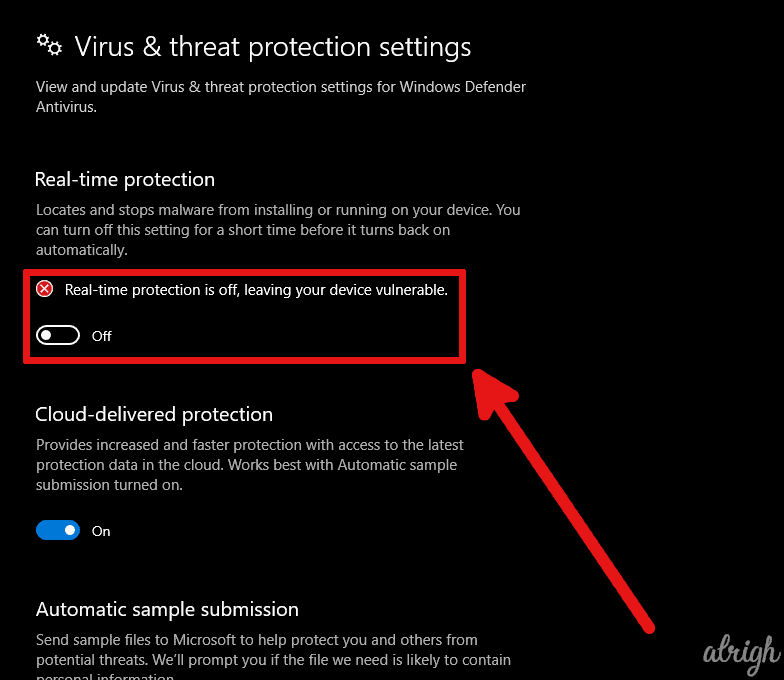
Now, try to run the Windows Update Service. Hopefully, by now, it should start running properly.
Solution 6: Reset the Windows Update Repository
If you’ve reached solution 6 and had no luck with the previous 5 solutions, you can try to reset the Windows Update Repository.
What does that mean? Basically, we’re going to do something similar to solution 2. We’ll replace the Software Distribution folder with a new Software Distribution folder and pray to God that it works.
To do so, follow these steps:
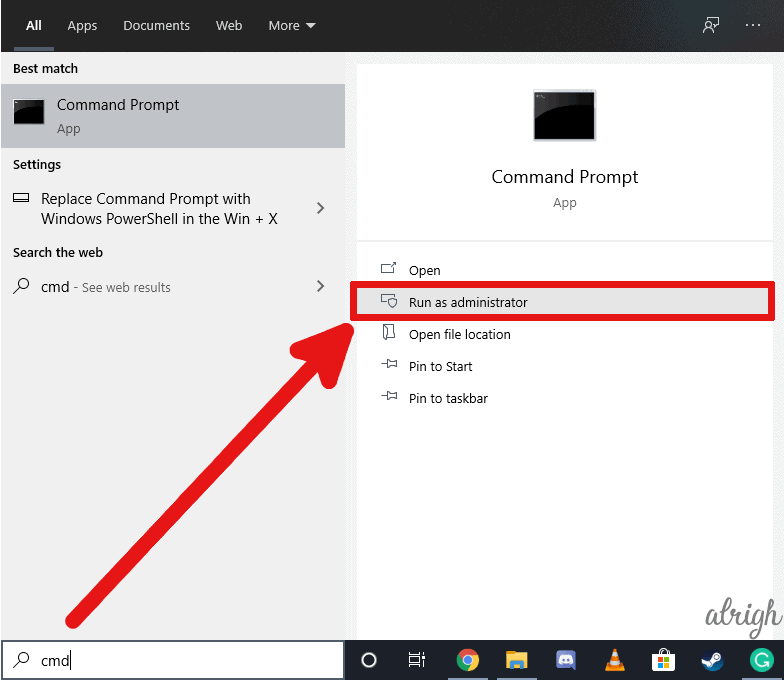
- Press the Windows key to access the start menu.
- Type in CMD and run it as an administrator.
- Now in the command line, type “net stop bits” and press Enter.
- After that, type “net stop wuauserv” and press Enter again.
- Now, Go to This PC > Local Disk C (or wherever your Windows is installed) > Windows
- Look for a folder named “SoftwareDistribution” and rename it to “SoftwareDistribution.old”
- Now, go back to the command prompt (CMD)
- In the command line, type “net start bits” and press Enter.
- Then type “net start wuauserv” and press Enter again.
- Restart your PC
After restarting your pc, try to see if the Windows Update Service is running properly.
Solution 7: All is lost… Or is it?
If none of the above solutions worked for you, you can try to use a system restore point. But that option is only viable if you had already made a restore point in the past.
If you don’t have any restore points you can always try to use a Windows 10 USB to repair your current version of Windows 10.
Note: You won’t lose any of your data if you just repair your existing installation of Windows 10
I hope this article helped you run the Windows Update Service. If you have any questions or comments, or if you know a working method you would like to add to this article, let us know in the comment section below.