“How can I take a screenshot on my Dell laptop/desktop?” Everyone knows how to take screenshots on a mobile phone. But surprisingly, not a lot of people know how to take screenshots on a PC. Taking a screenshot on a PC is very easy! Unlike mobile phones, there are multiple ways of taking screenshots on a Dell laptop/desktop. I’ll guide you through all the methods to take a screenshot on your Dell PC.
Contents
How to Take a Screenshot on a Dell Laptop?
You can use screenshots for all sorts of things! I see myself taking at least one screenshot a day. Sometimes it’s to show my friends a funny meme I came across on Reddit, other times it’s to capture a high score in a video game. Screenshots can also be used as a reminder, or a way to forever save a conversation with a friend. Case in point; screenshots can be very helpful. They can be very convenient, and even help you be more productive.
The following are the Dell laptop/desktop PCs that support screenshots. If you have any of the following Dell laptops/desktops you’ll be able to easily follow along with this guide.
- Dell Inspiron Series
- Dell G Series
- Dell Latitude Series
- Dell Precision Series
- Dell Vostro Series
- Dell XPS Series
- Dell Studio Series
- Dell Adamo Series
This guide will be applicable if your Dell laptop is running any of the following Windows Operating Systems:
- Windows 10
- Windows 8.1
- Windows 8
- Windows 7
- Windows Vista
- Windows XP
If you are running a Linux based OS, don’t worry! Some of the methods we are going to discuss today will be applicable for Most Linux Distros.
How to screenshot on Dell laptop or Desktop using Print Screen?
There are a few ways to capture screenshots using simple keyboard shortcuts.
Take a Screenshot of the Active Window
You can take the screenshot of the active window (the one on the top) on your Dell laptop/desktop. Follow these steps to capture the active window:
1. Taking a Screenshot of The Active Window Using Paint (Works for Windows 7/8/8.1/10)
You can use Prt Scn to take screenshots and save them to the clipboard. You can then paste them into Paint (or any other Graphics tool). And save it from there. Follow these steps to save screenshots of an active window on your Dell Laptop or Desktop PC:
- Click the Window you want to take a screenshot of to select it.
- Press “Alt” & “PrtScn” at the same time.
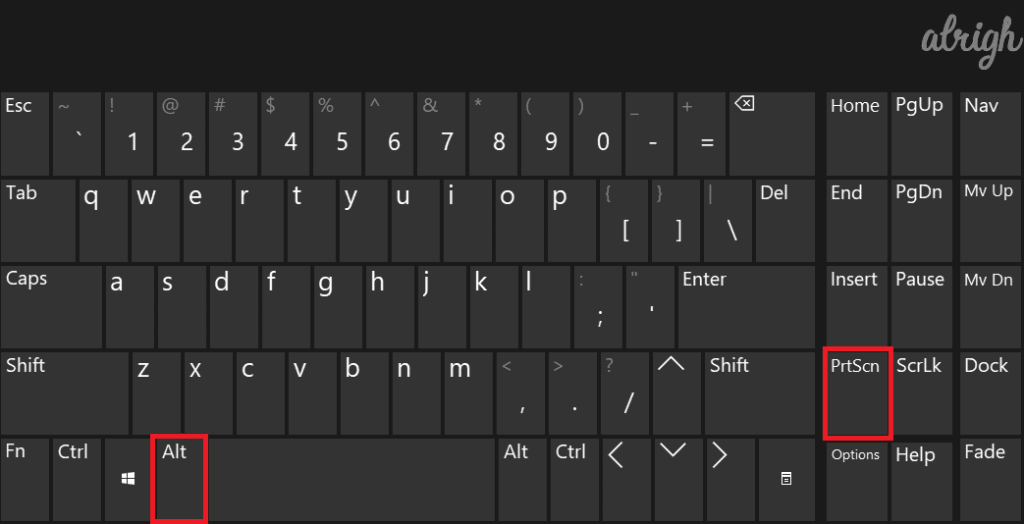
- Windows will now save your screenshot to the clipboard.
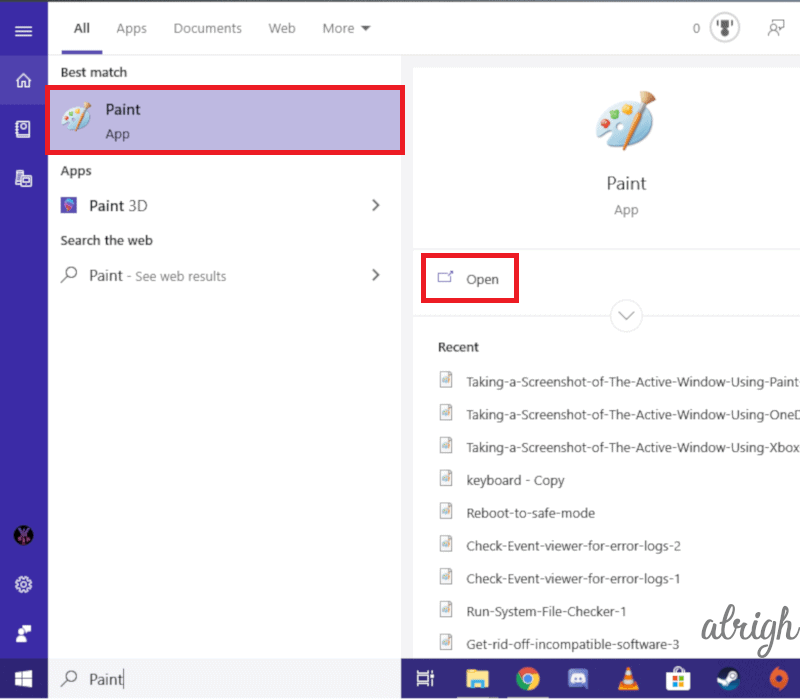
- Open Paint.
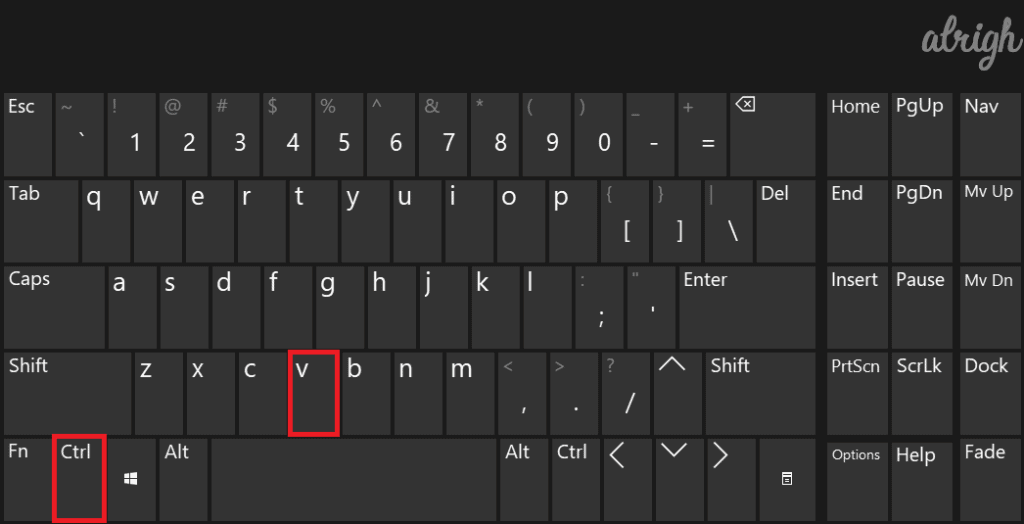
- Press “Ctrl” + “V” to paste the screenshot into Paint.
- Make any necessary adjustments to the screenshot and then save it anywhere you like.
2. Taking a Screenshot of the Active Window Using Xbox Game Bar (applicable to Windows 10)
The Xbox Game bar in Windows 10 allows you to take screenshots of specific windows with ease. Follow these steps to successfully capture screenshots of specific windows on your Dell Laptop or Desktop Computer.
- Click the Window you want to take a screenshot of to select it.
- Press the “Windows key” + “Alt” + “PrtScn” (in some keyboards “PrtScn” might be with a different name like “PrtSc” or “PS“
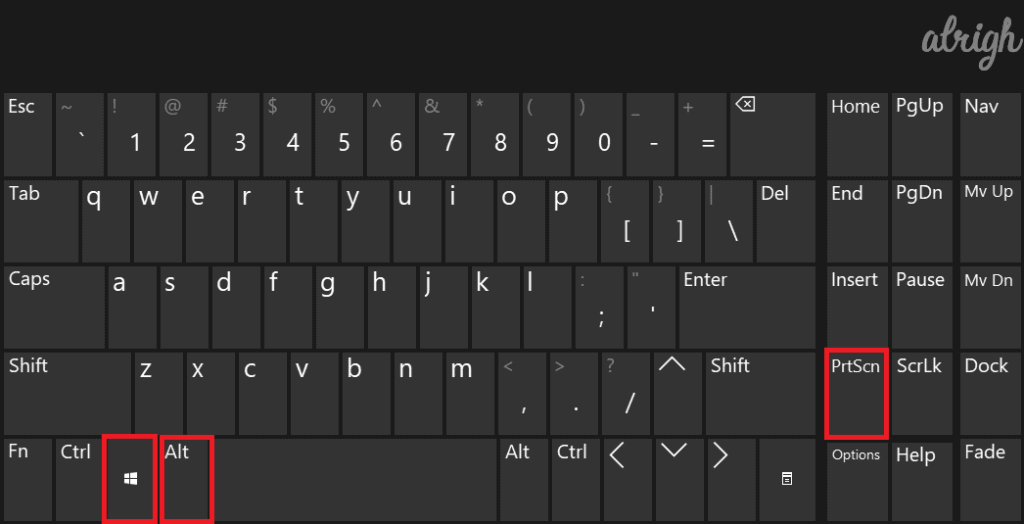
- This will use the Xbox Game Bar to take the screenshot of the active window
- You will find the screenshot saved in This PC > Videos > Captures.
3. Taking a Screenshot of The Active Window Using OneDrive (applicable to Windows 10)
Windows 10 allows you to capture screenshots and save them directly on to your OneDrive. This can be very convenient if you have the OneDrive app on your mobile. You’ll be able to seamlessly share screenshots using your mobile phone. But before you take screenshots using OneDrive, you have to give OneDrive permission to save screenshots. Follow these steps to allow OneDrive to save screenshots.
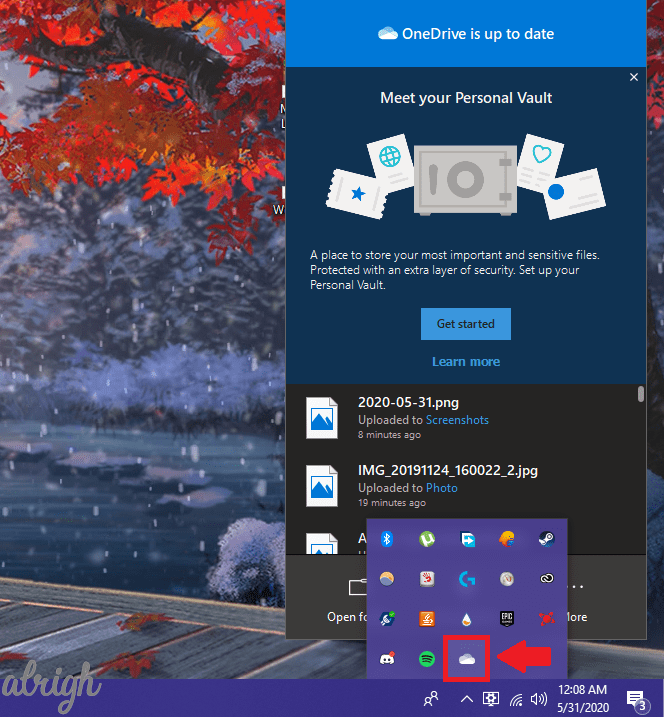
- Click on the OneDrive icon at the bottom right on the Taskbar.
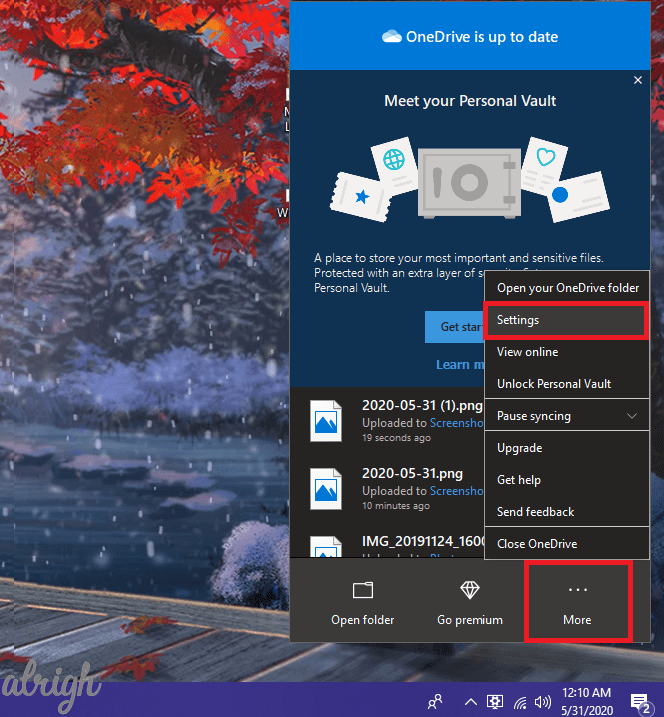
- Click on “More” and then click on “Settings“.
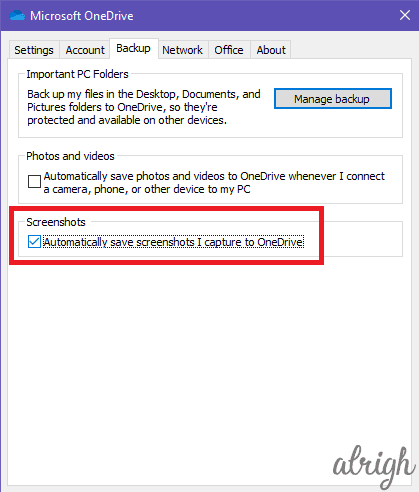
- In the BackUp Tab, click on “Automatically Save Screenshots I capture to OneDrive“.
This will allow OneDrive to save screenshots directly onto the drive. But OneDrive won’t save all screenshots onto the drive. To capture screenshots that go straight to OneDrive follow these steps:
- Click the Window you want to take a screenshot of to select it.
- Press “Alt” & “PrtScn” at the same time.
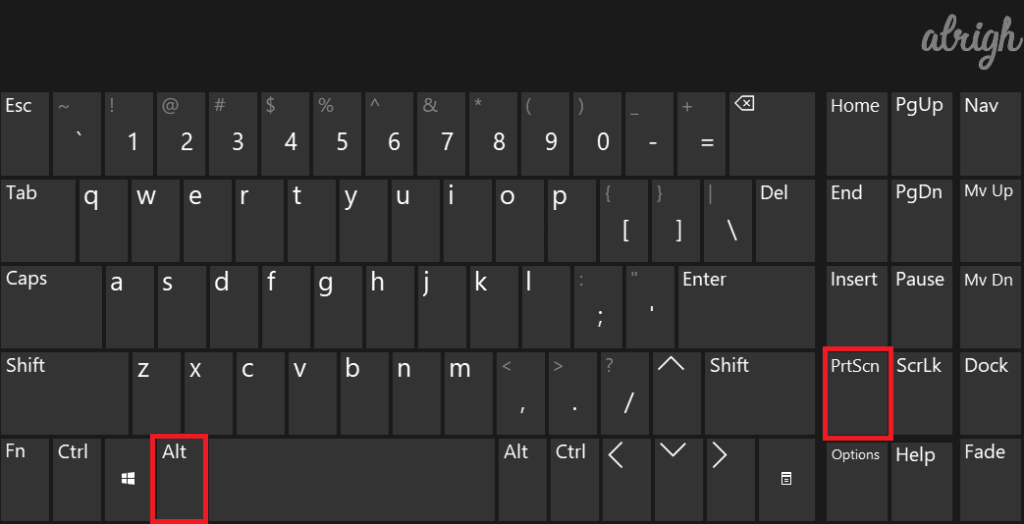
- This will save the Screenshot under OneDrive > Pictures > Screenshots.
4. Taking Screenshot of The Active Window on Linux
Taking a screenshot on most Linux Distros is quite easy. Just follow these steps:
- Click the Window you want to take a screenshot of to select it.
- Press “Alt” & “Prt Scn” at the same time.
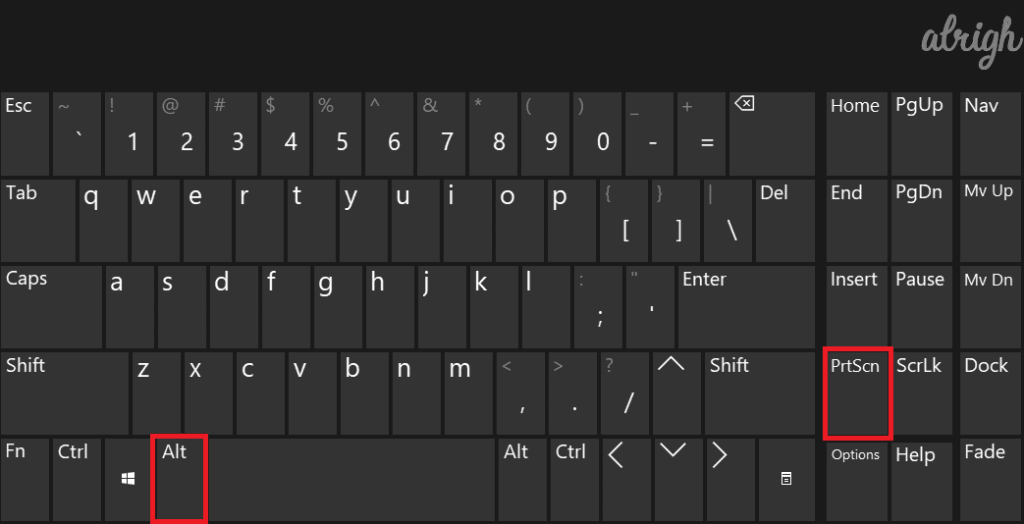
- A dialog box will show up asking you where you want to save the screenshot.
- Select a destination and then press “Save“.
Take a Screenshot of the Entire Screen
You can take the screenshot of the entire screen on your Dell Laptop or Desktop. It’s quite simple and I’ll guide you through it.
1. Taking a Screenshot of The Entire Screen Using Paint (applicable to Windows 7/8/8.1/10)
- Click the Window you want to take a screenshot of to select it.
- Press “PrtScn“.
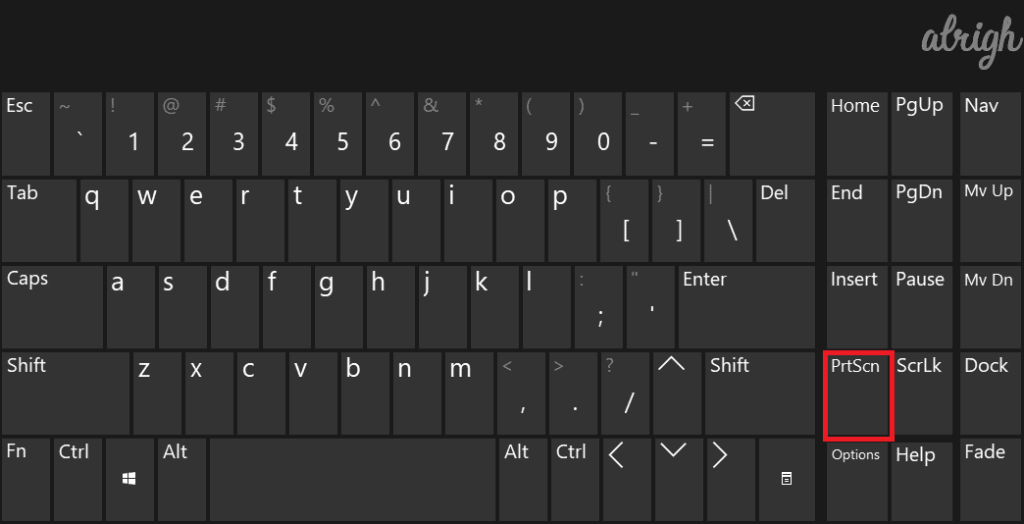
- Windows will now save your screenshot to the clipboard.
- Open Paint.
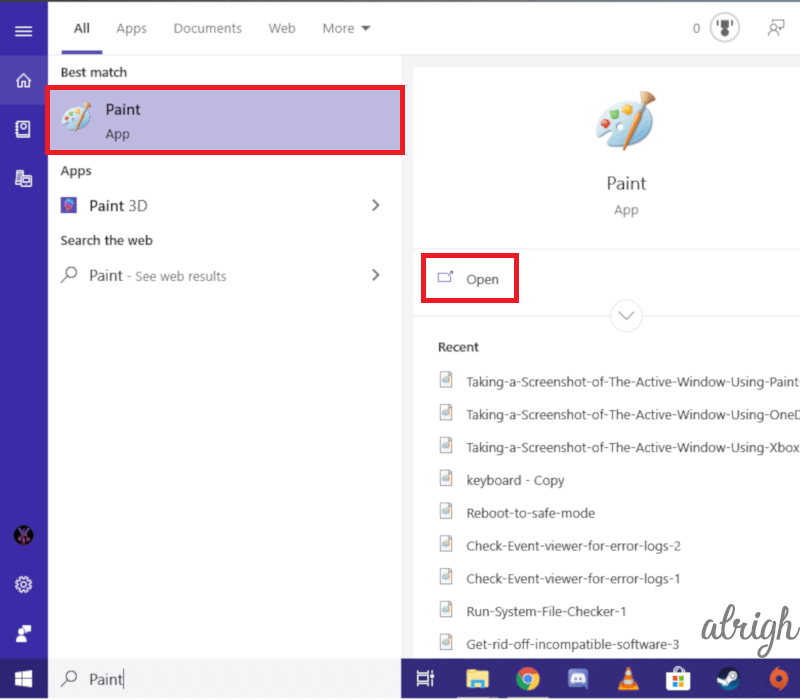
- Press “Ctrl” + “V” to paste the screenshot into Paint.
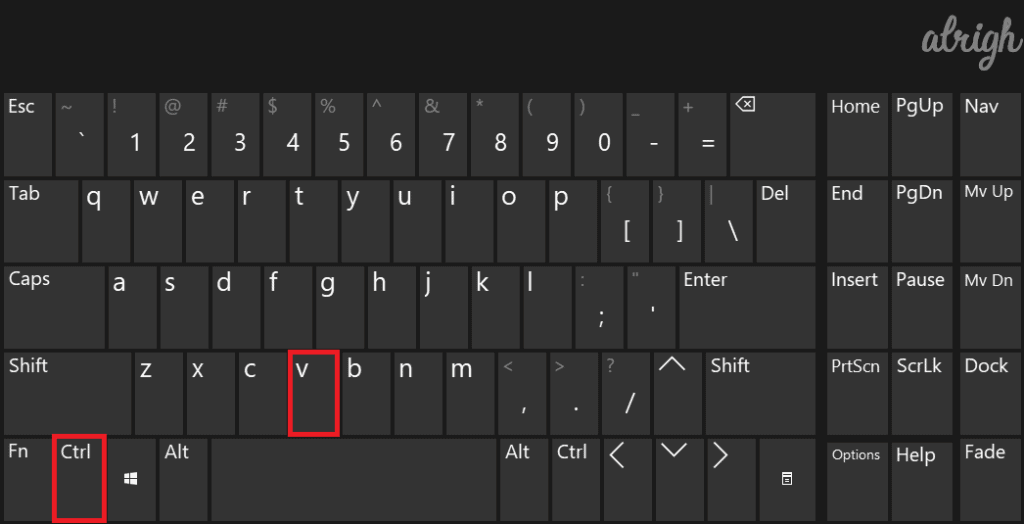
- Make any necessary adjustments to the screenshot and then save it anywhere you like.
2. Taking a Screenshot of The Entire Screen Using OneDrive (applicable to Windows 10)
Refer back to “Taking a Screenshot of the active window” to allow OneDrive to save Screenshots. To take a screenshot of the entire screen using OneDrive follow these steps:
- Simply Press “Prt Scn”.
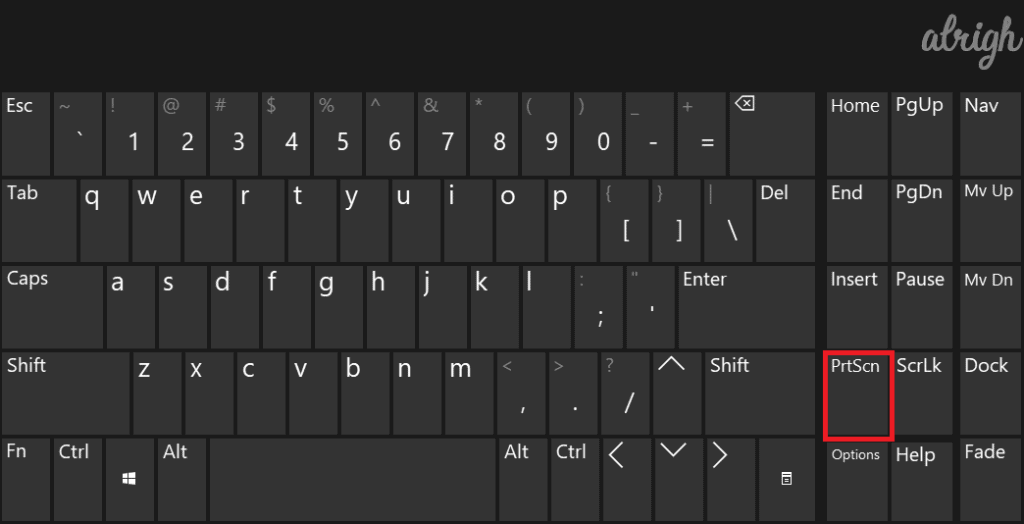
- You’ll be able to find the screenshot saved under OneDrive > Pictures > Screenshots.
3. Taking a Screenshot of The Entire Screen Using Win + Prt Scn (applicable to Windows 8/8.1/10)
Windows 8, 8.1 & 10 have a feature with which you can easily capture the entire screen and save it to a folder under This PC > Pictures > Screenshots. Follow these steps:
- Press “Windows key” + “Prt Scn“.

- The Screen will get dim for half a second signifying that Windows has taken a screenshot.
- The Screenshot will automatically be saved to This PC > Pictures > Screenshots.
4. Taking a Screenshot of The Entire Screen on Linux
Most Linux Distros have built-in support for screenshots. Ubuntu and Linux Mint being some of the most popular ones that support it. Here’s how you can take the screenshot of the entire screen on your Dell Laptop or Desktop PC running Linux OS:
- Press “PrtScn“.
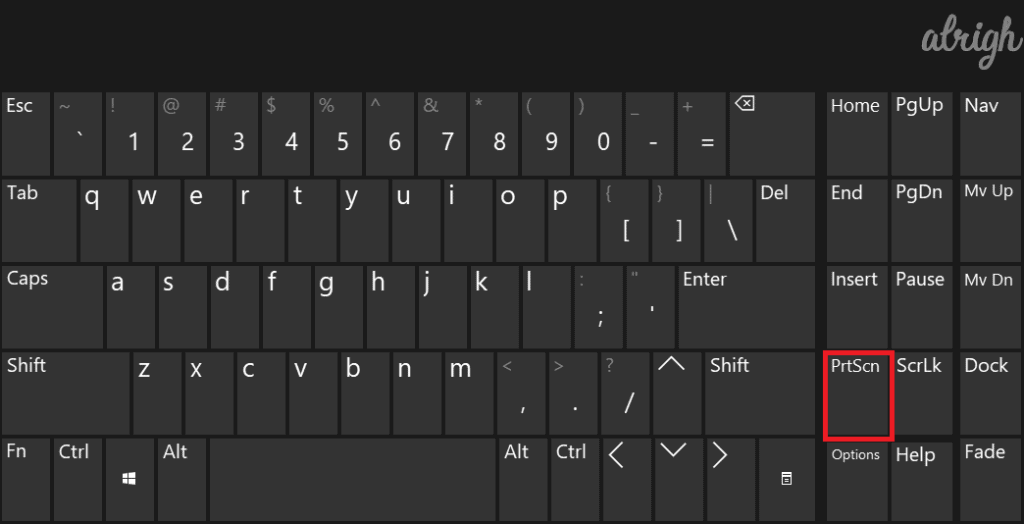
- A dialog box will show up asking you where you want to save the screenshot.
- Select a location and then press “Save“.
How to Take a Screenshot of Multiple Screens Connected to Your Dell Laptop or Desktop PC?
If you have multiple monitors connected to your Dell Laptop/Desktop using “Windows key” + “Prt Scn” will result in an abnormally large screenshot of all the monitors. This can be quite inconvenient. Thankfully, there’s a simple workaround! There is a keyboard shortcut specifically for taking a screenshot of a single monitor while having multiple monitors connected to your Dell Laptop/Desktop.
Follow these steps to take a screenshot of a single monitor:
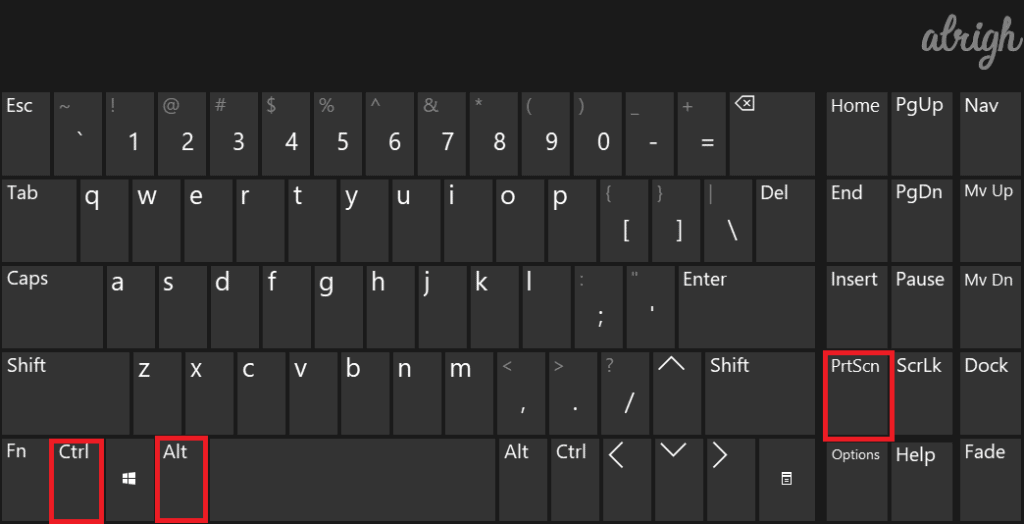
- Move your cursor to the screen you want to take a screenshot on.
- Now press “Ctrl” + “Alt” + “Prt Scn“to take a screenshot of the monitor your cursor is currently on. (make sure there is a program open on this monitor).
- Open Paint.
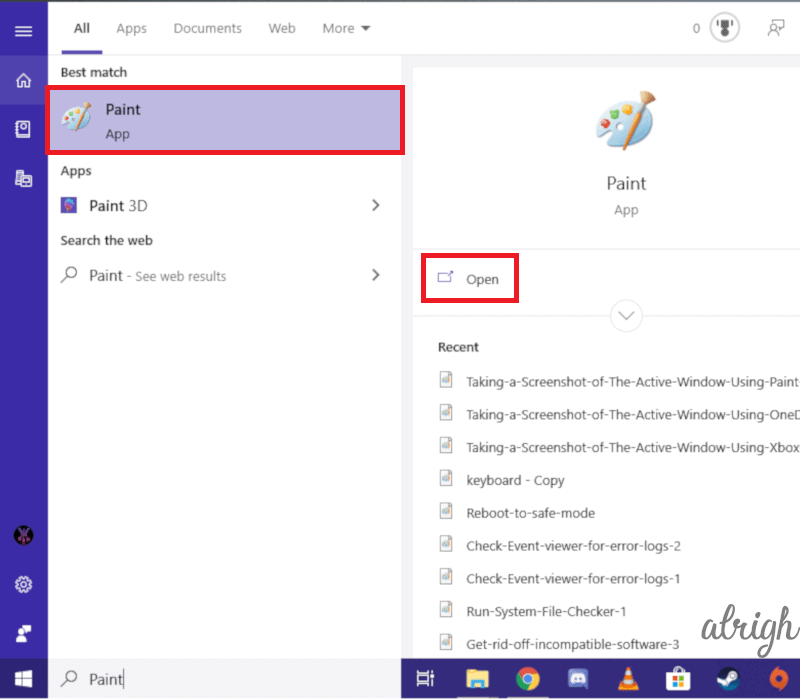
- Press “Ctrl” +”V” to paste the screenshot.
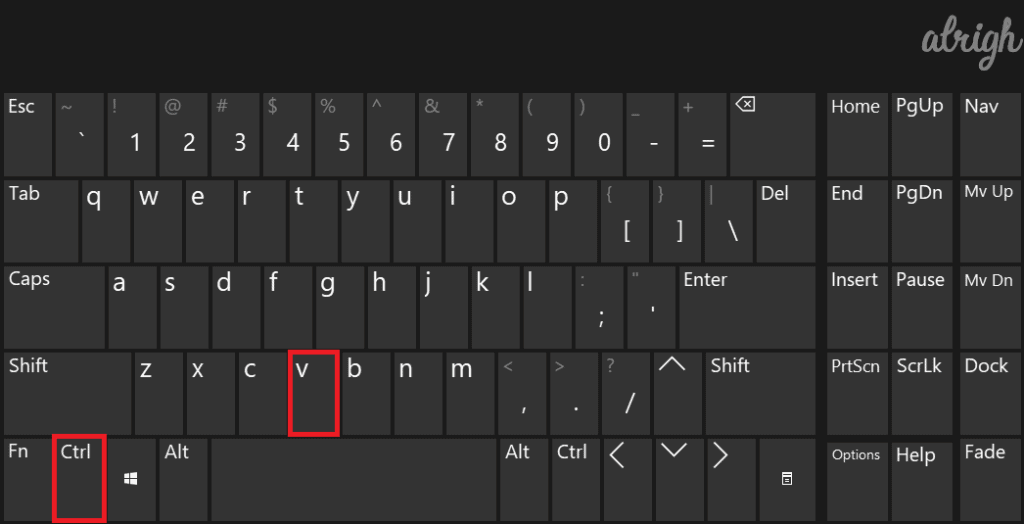
- Make any necessary adjustments and then save the screenshot to your desired location.
Edit & Customize Screenshots using Windows Snipping Tool!
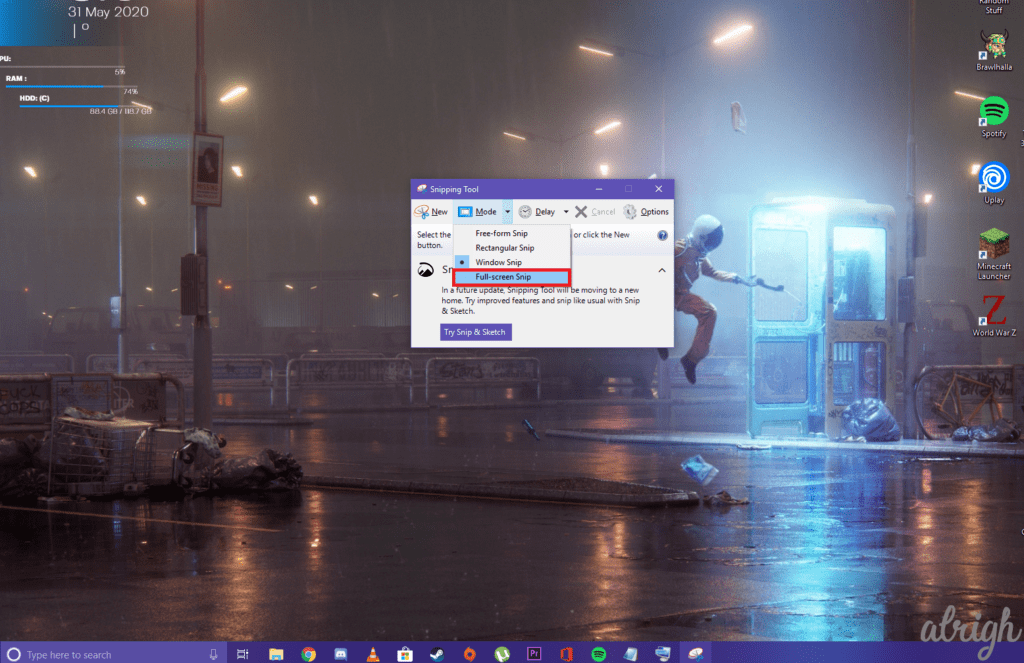
Windows 7 and above all have this in-built application called the “Snipping Tool“. It was made to easily take and edit screenshots. It is the go-to tool for many when it comes to screenshots on a PC. You can use this on your Dell laptop/Desktop to easily take screenshots.
The snipping tool has 4 screenshot modes.
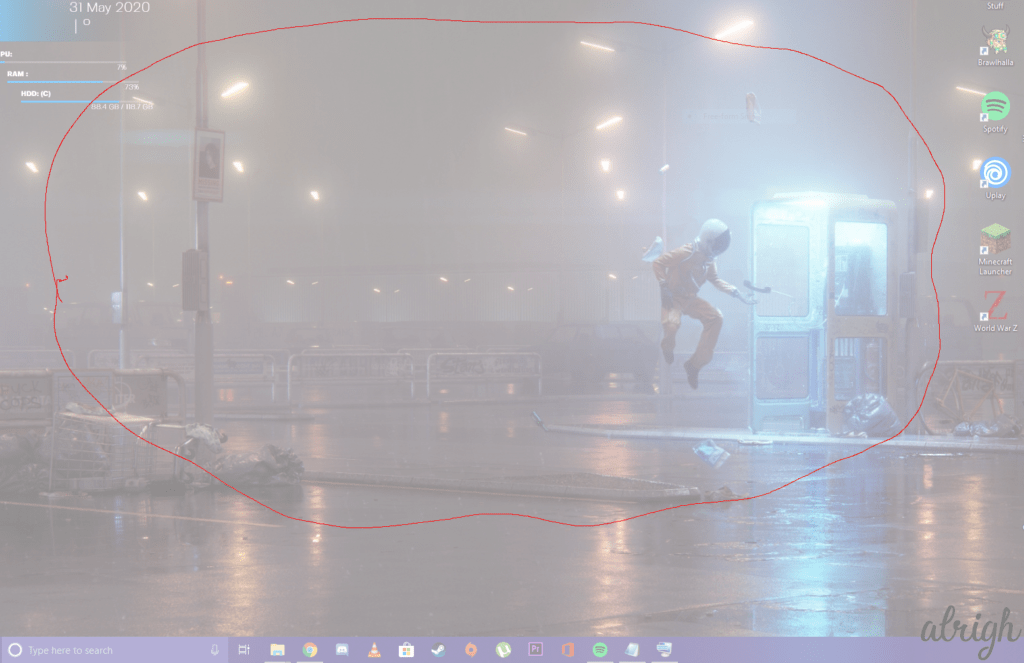
Free form Snip
This mode allows you to take screenshots by drawing a free form shape around an object. The Snipping Tool saves the free form shape as a screenshot.
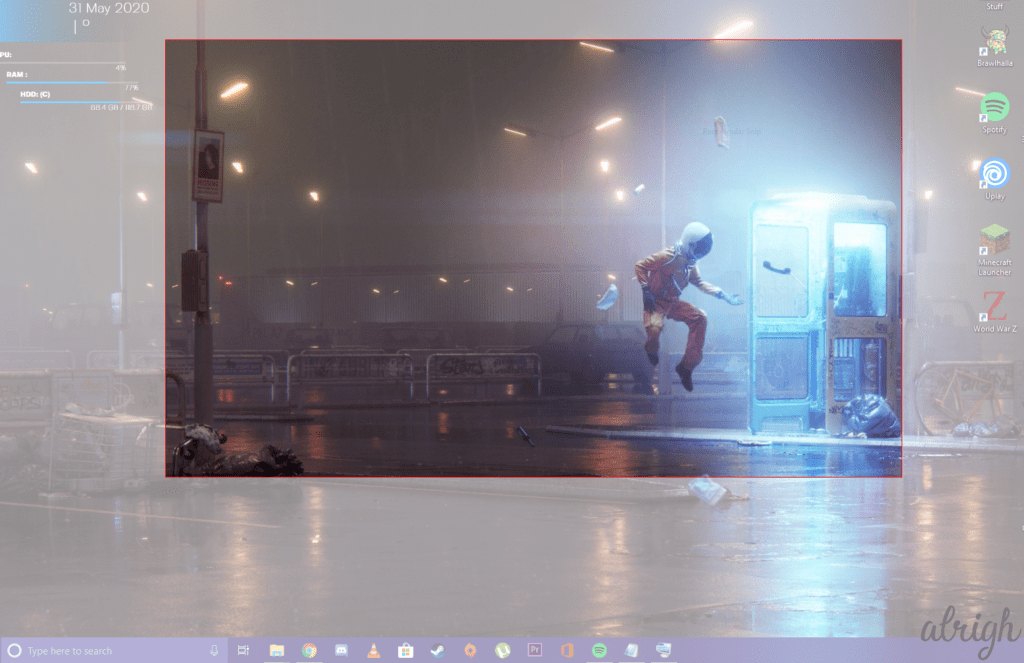
Rectangular Snip
This mode allows you to take screenshots by drawing a rectangle. The Snipping tool will capture the area in the rectangle as a screenshot.
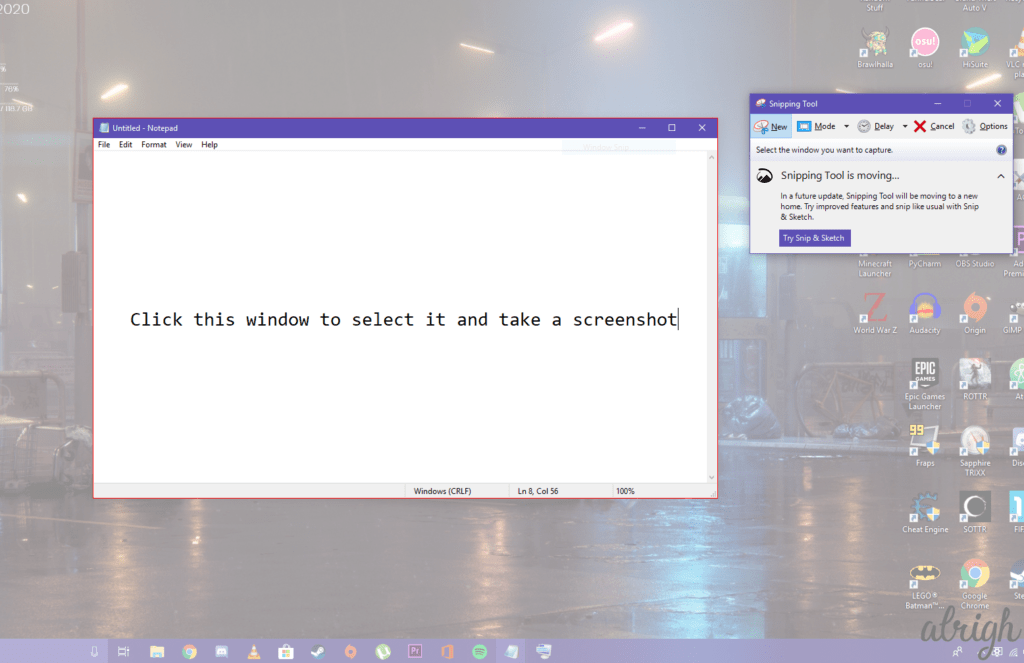
Window Snip
This mode allows you to take a screenshot of the active window by selecting it. You can just click a window to select it.
Full-Screen Snip
This mode allows you to take a screenshot of the entire screen.
Use Browser Extensions or Add-Ons to Capture Screenshots
Browser Extensions/Add-Ons that allow you to take a screenshot of the entire webpage, make life so much easier! Instead of taking multiple screenshots with the built-in OS Screenshot tool, you can simply use these Add-Ons to take one long screenshot.
For Google Chrome
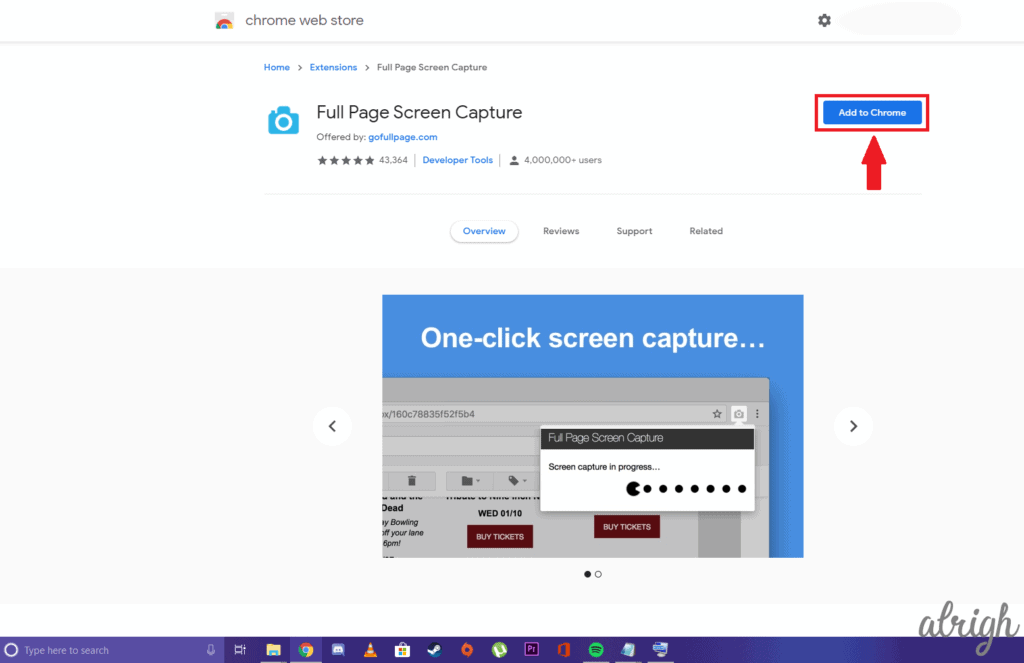
“Full Page Screen Capture“is a Chrome Extension made by gofullpage.com. You can use this extension to easily take screenshots of entire webpages on Chrome. You can add this extension to chrome here.
For Firefox
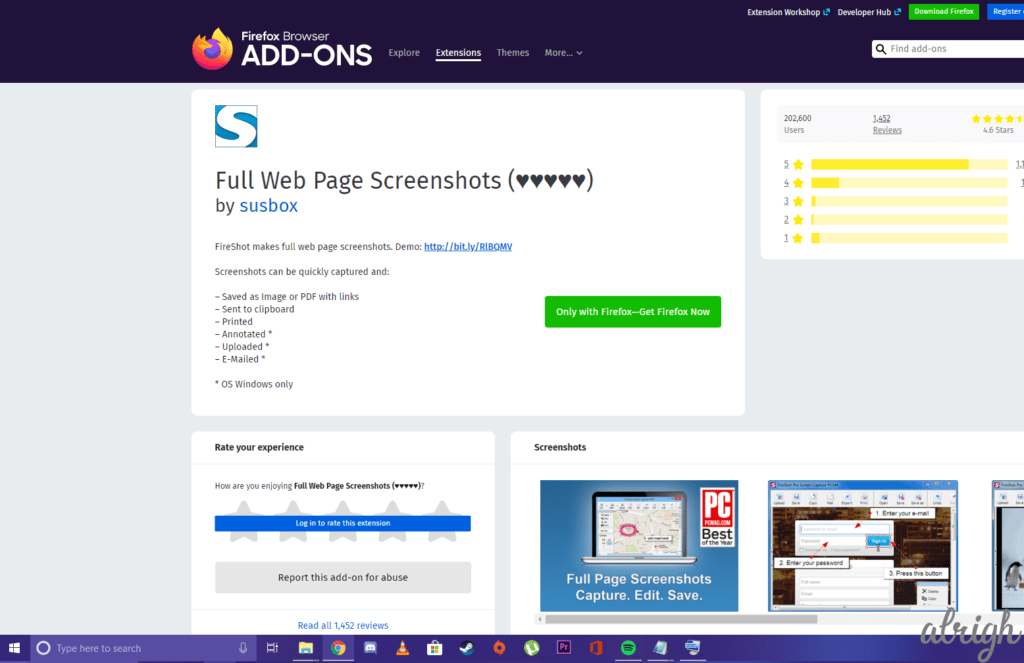
If you are a Firefox user, don’t worry! We got you covered! “Full Web Page Screenshots (♥♥♥♥♥)” is a Firefox Add-On by susbox that lets you take screenshots of entire webpages. You can check it out here.
For Microsoft Edge
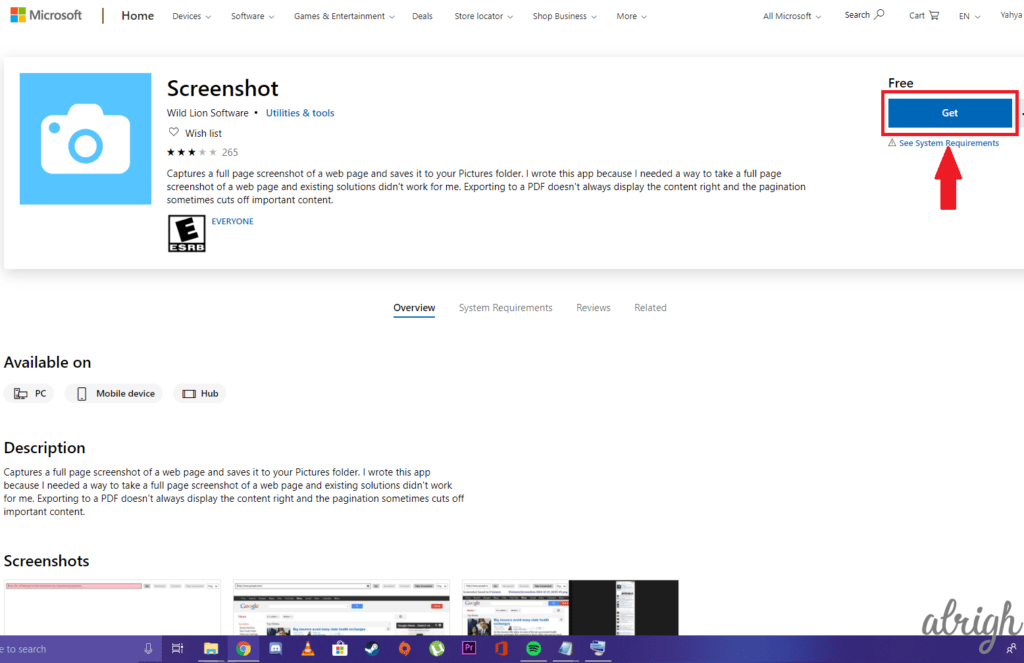
You’ll be able to find the Extension called “Screenshot” by “Wild Lion Software” in the Microsoft Store. You can use this to capture screenshots in Microsoft Edge. You can get it for yourself here.
For Opera
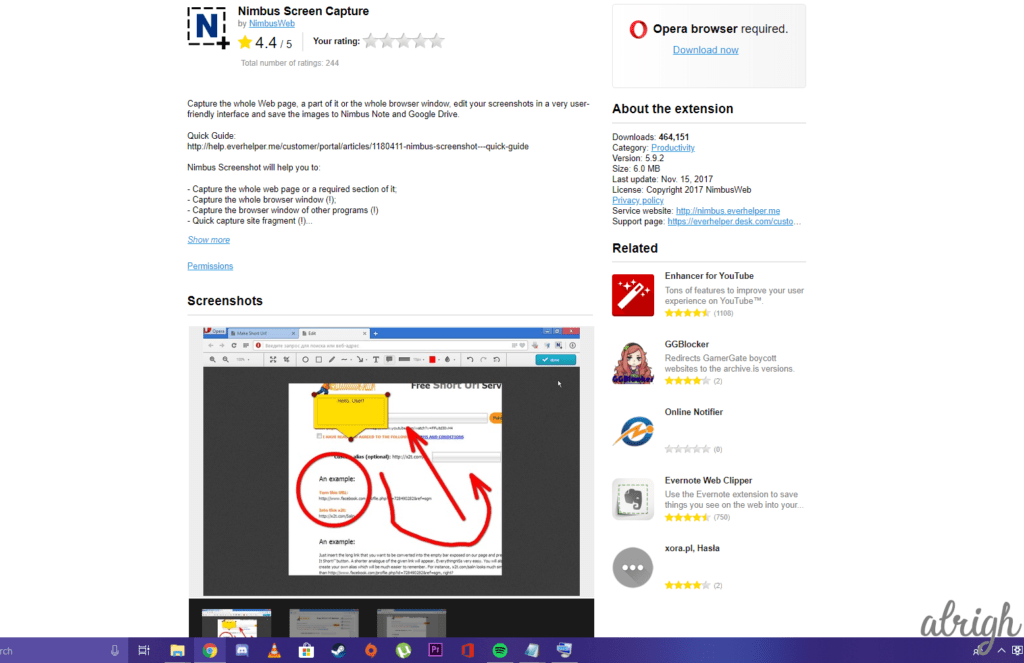
“Nimbus Screen Capture” by NimbusWeb is a nifty Add-On. You can use it to get Full page screenshots. It even allows you to edit your screenshots before saving them. Check it out here.
I hope this article answered your question! By now you’ll be able to take screenshots on any Dell Laptop/Desktop. One thing you should keep in mind is, most of these methods will work on most PCs. Taking screenshots on Desktops/Laptops is as easy as it is on mobile phones! You just have to remember a few keyboard shortcuts. If you have any questions, feel free to mention them in the comment section below.
