If you’ve run into “Matchmaking Failed: VAC was unable to verify your game session,” then you don’t need to worry. Even though you might think VAC (Valve Anti-Cheat System) has banned you or something, this is just a bug. Unfortunately, people in the CSGO community have been dealing with this bug for years, and they still haven’t patched it up.
This bug occurs due to missing or corrupted files in CS: GO, or Steam itself. Some people have also mentioned that the bug occurs due to DirectX issues. Thankfully the fix is pretty simple.
We have compiled all the various fixes we could find for this error. You can go through this list and see which one works for you.
Contents
How to Fix VAC Was Unable to Verify Your Game Session in Counter-Strike: Global Offensive (CSGO)?
Without further ado, here are X ways you can fix the “VAC was unable to verify your game session” bug.
Solution 1 – Verify Game Files & Restart Your PC
This solution seems to be working for a lot of people. Verifying game files will check to see if there are any missing or corrupted CSGO files and replace them.
So, follow these steps to verify your game files:
- Open your steam client.
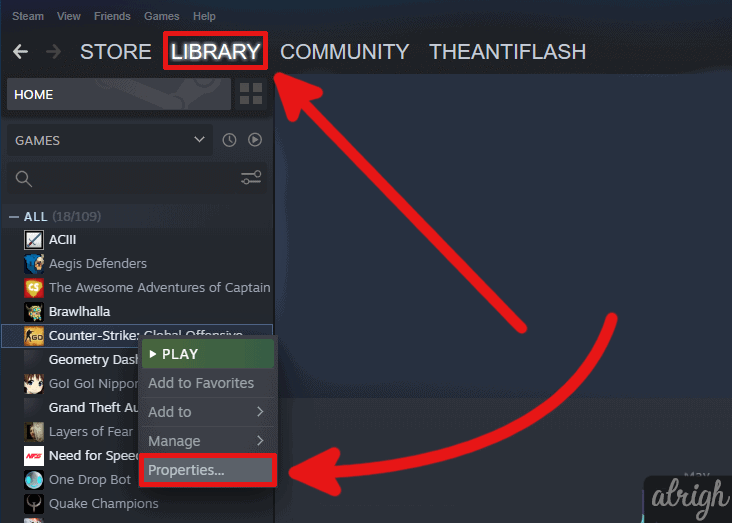
- Go to the Library.
- Right-click on Counter-Strike: Global Offensive.
- Click on Properties.

- Go to the Local Files tab.
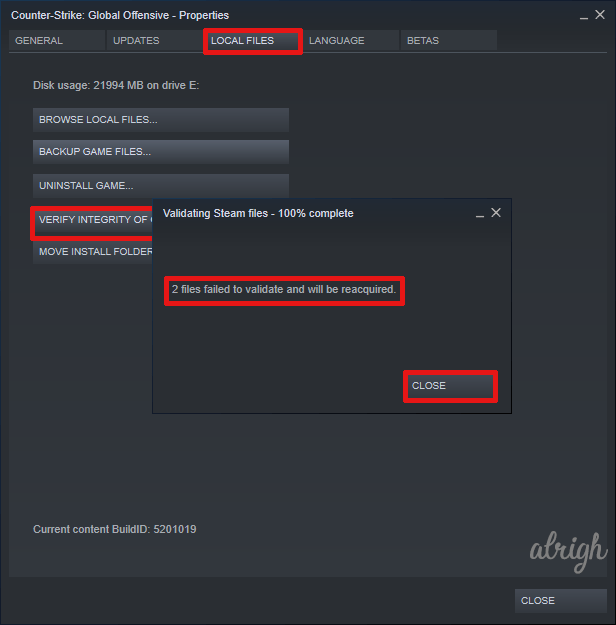
- Click on “VERIFY INTEGRITY OF GAME FILES…”
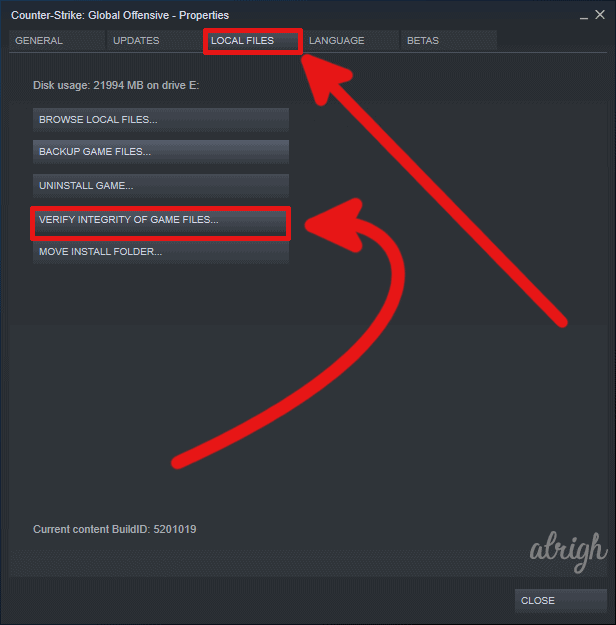
- Wait for the process to finish and then click close.
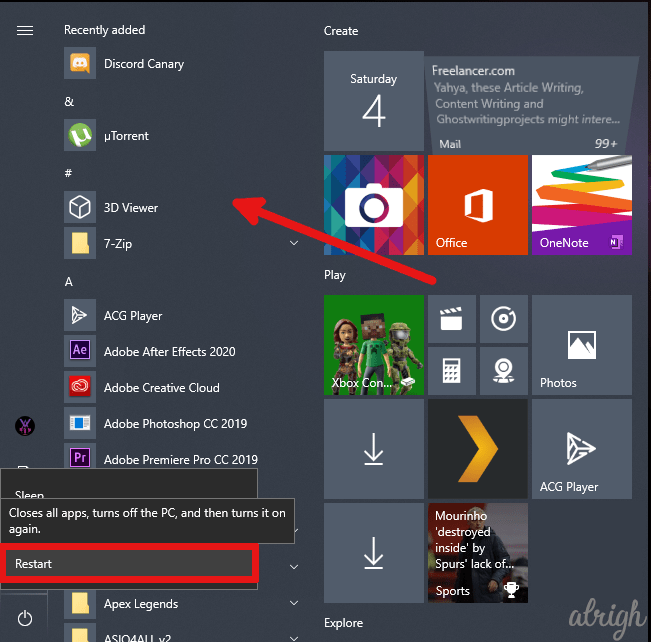
- Now, Restart your PC.
Now, try to play CSGO again to see if the bug is gone.
If the bug isn’t gone, don’t worry. There are a few other solutions you can try.
Solution 2 – Copy Steamservices.dll to Common Files
Sometimes the error could be in the Steam Services. We can fix this by copying steamservices.dll from Steam installation directory to Local Disk C>Program Files>Common Files>Steam
To do this, follow these steps:
- First, verify the integrity of game files, but don’t restart your PC (look at solution 1 for reference).
- Open Task Manager and close all Steam tasks.

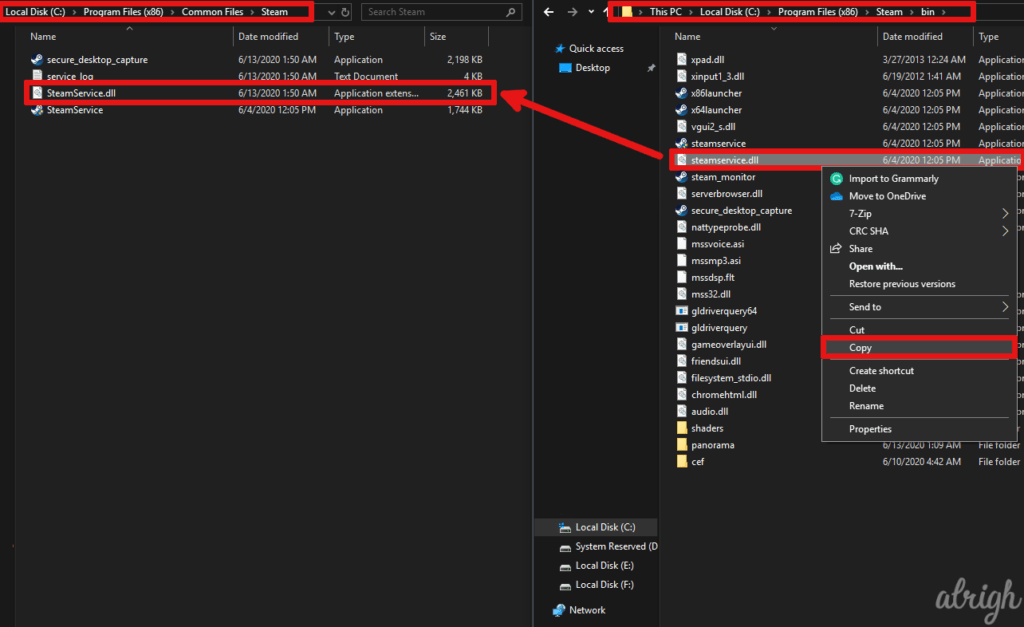
- Go to the folder where you installed Steam.
- Open the bin file.
- Copy steamservices.dll.
- Now, go to C:\Program Files (x86)\Common Files\Steam and paste steamservices.dll.
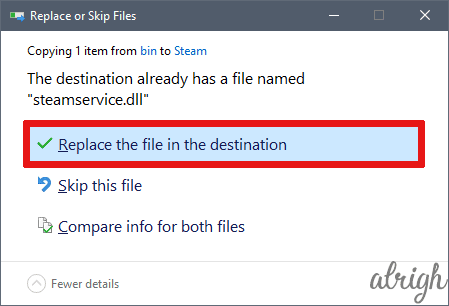
- A window will open asking you if you want to replace or skip the file.
- Click on Replace the File in the destination.
After you’ve done that, launch Steam. Hopefully, the bug should be gone now. If VAC still can’t verify your game session, try these next few solutions.
Solution 3 – Run Steam as An Administrator
Many people have also reported that running Steam as an administrator works. You might think there’s no way that the solution for this problem is as simple as just running Steam as an admin.
Well, it seems that sometimes Windows permissions can intervene with VAC, which can stop it from verifying your game session. So, in this case, the fix is as simple as running Steam as an admin.
To run Steam as an administrator, follow these steps:
- Press Ctrl + Shift + Esc to open up the task manager.
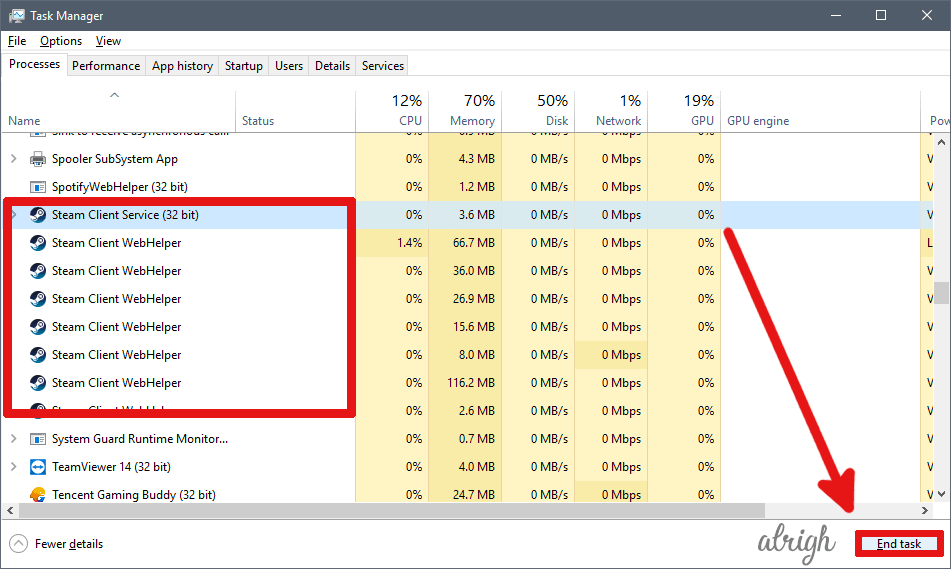
- Find all Steam tasks and end them (you cold-blooded monster!)
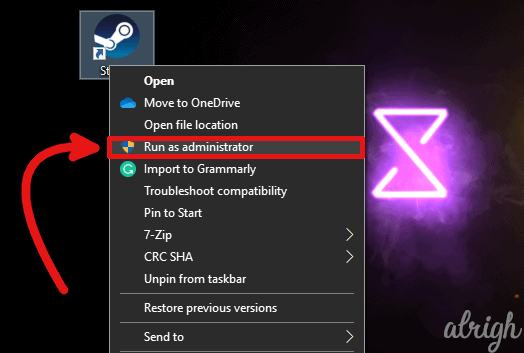
- Now right-click on your Steam shortcut and click on Run as administrator.
Hopefully, this fixed the bug. But, if it didn’t, don’t worry. There are still a few other solutions you can try.
Solution 4 – Set Launch Option -verify
Here’s a neat little trick you can try. Steam allows you to set launch options for your games.
According to Steam, “Game launch options can be used to change game settings before running the game. Launch options allow the user to supersede the internal settings of the game. This is an effective means to recover from incompatible video settings and well as troubleshooting a wide range of issues.”
We can use the launch option -verify, to automatically verify CSGO files every time we launch CSGO.
To set the launch option, follow these steps:
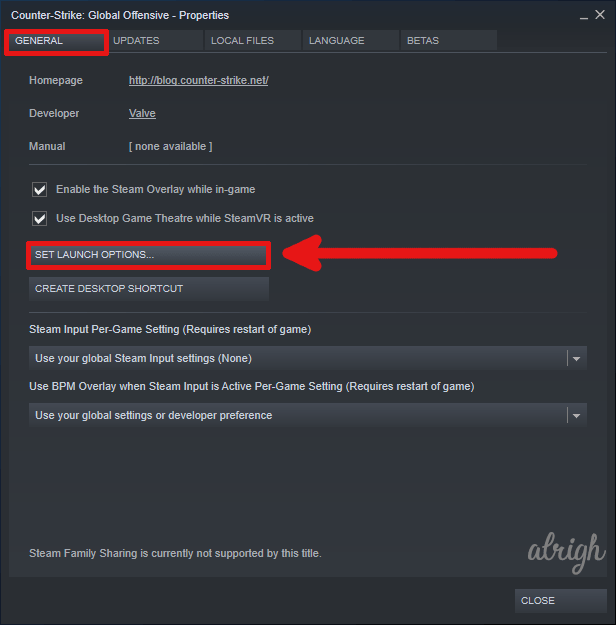
- Go to the Library.
- Right-click on Counter-Strike: Global Offensive.
- Click on Properties.
- Click on “SET LAUNCH OPTIONS…”
- Type in –verify
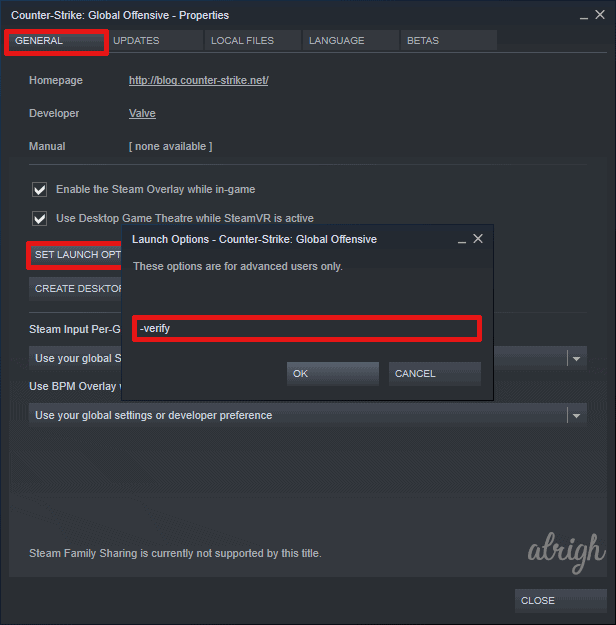
- Click on OK.
Now, restart your PC and then launch CSGO. Check to see if the VAC bug occurs again. If all goes well, this should fix the bug.
Solution 5 – Repair the Steam Client with CMD
If none of the above solutions work for you, you can try to repair the Steam client. To rule out any corrupted files in the Steam directory, we can use the command prompt to find and repair corrupted Steam files.
To repair the Steam client, follow these steps:
- Press Ctrl + Shift + Esc to access the task manager.
- Find all Steam tasks and end them.
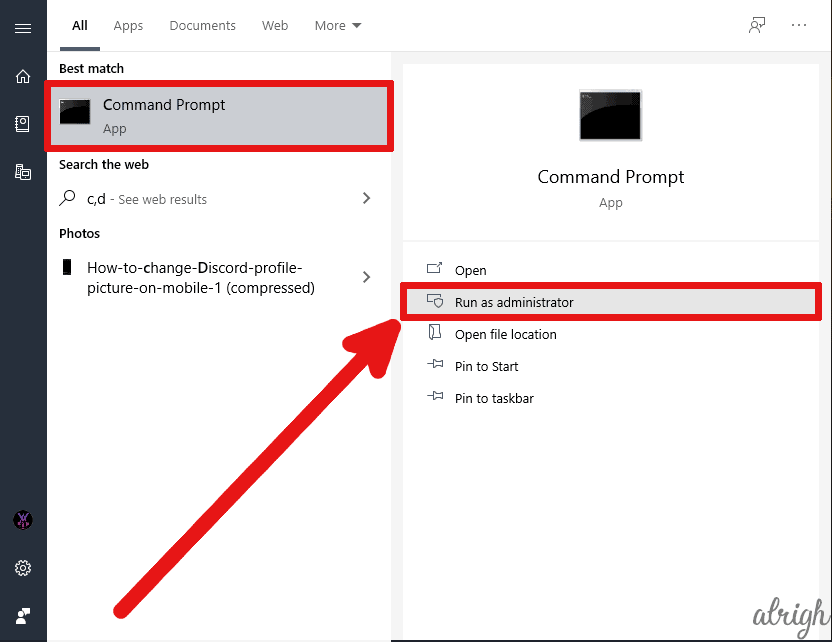
- Press the Windows Key to access the start menu
- Type “Cmd” and run it as an administrator.
- type in, “C:\Program Files (x86)\Steam\bin\SteamService.exe” /repair
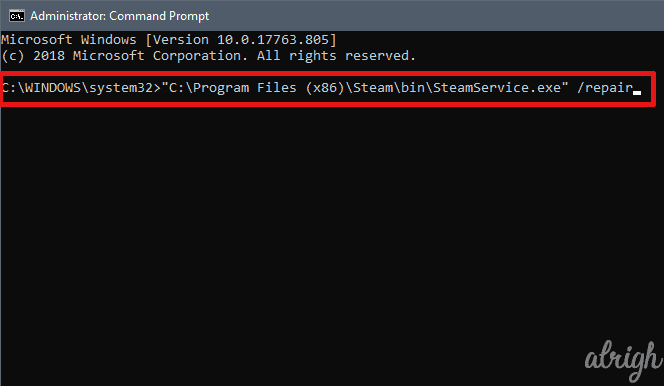
- If Steam is installed in another drive for you, replace C with that drive.
- Press Enter to execute the command.
After the command runs, try to launch CS:GO again. Hopefully, this should fix the bug.
Solution 6 – Whitelist Steam from Your Anti-Virus
Sometimes interference from your anti-virus software can cause the VAC bug. We can ensure that the root of the issue isn’t the anti-virus by whitelisting the Steam directory from the anti-virus scans.
Every anti-virus scan has a different whitelisting procedure, but if you’re using the default anti-virus built into Windows 10, you can follow these steps:
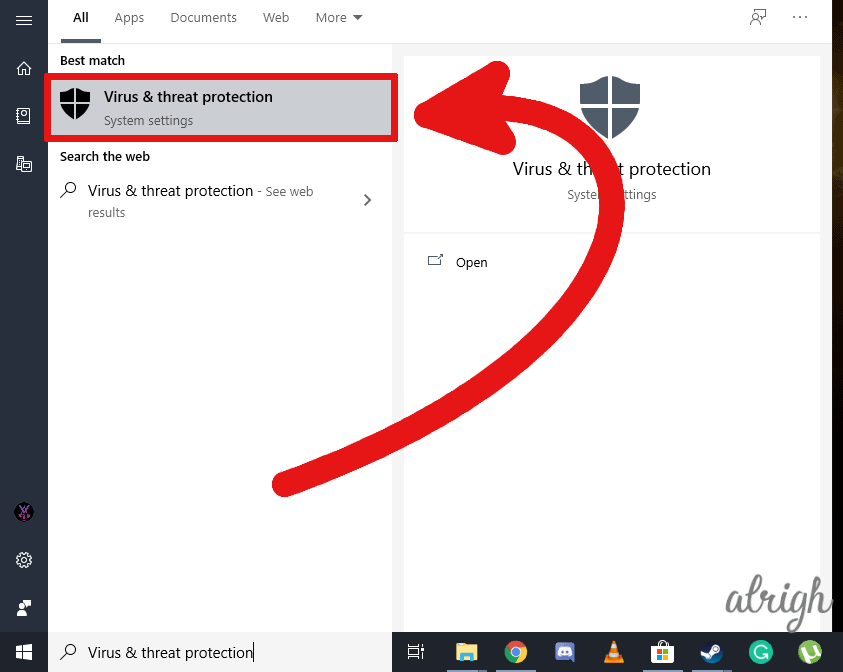
- Press the Windows Key to access the start menu.
- Type in, “Virus & threat protection” and then press Enter.
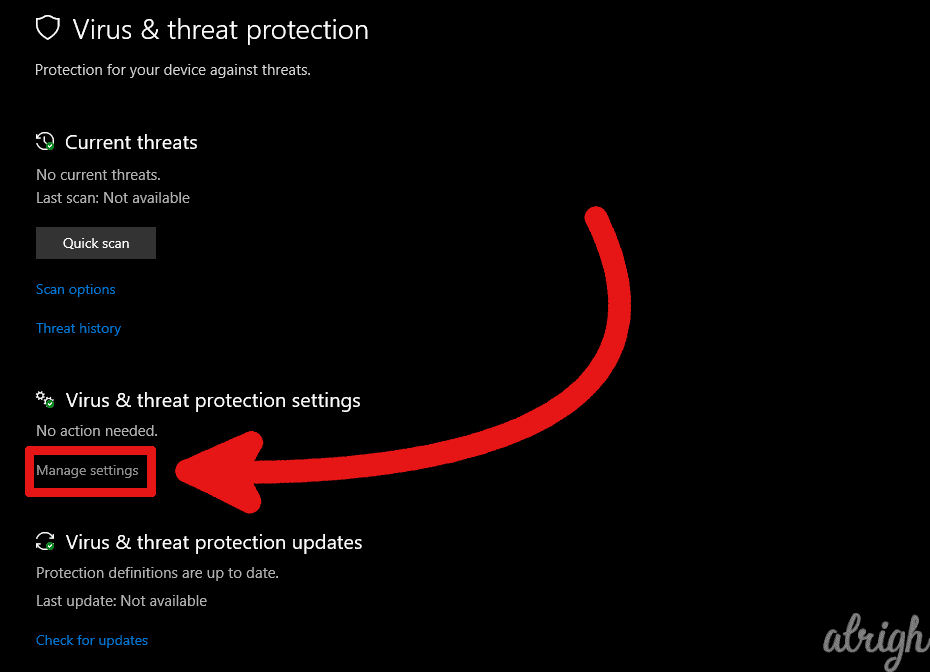
- Scroll down and click on Manage settings under Virus & threat protection settings.
- Scroll down again and click on Add or remove exclusions under Exclusions.
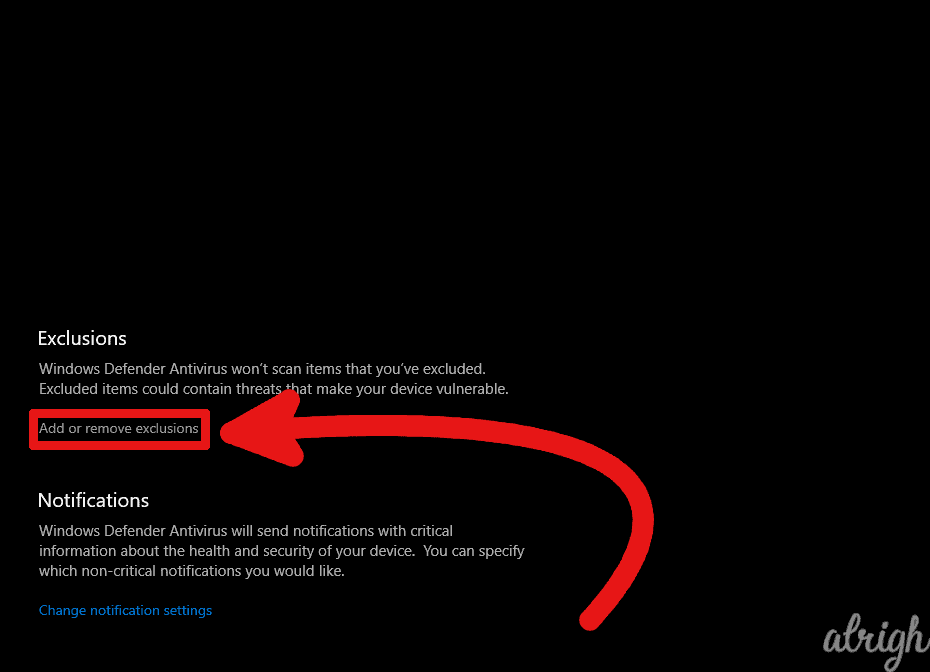
- Click on the Plus icon next to Add an exclusion.
- Click on Folder.
- Now, in the file explorer window file the Steam installation directory.
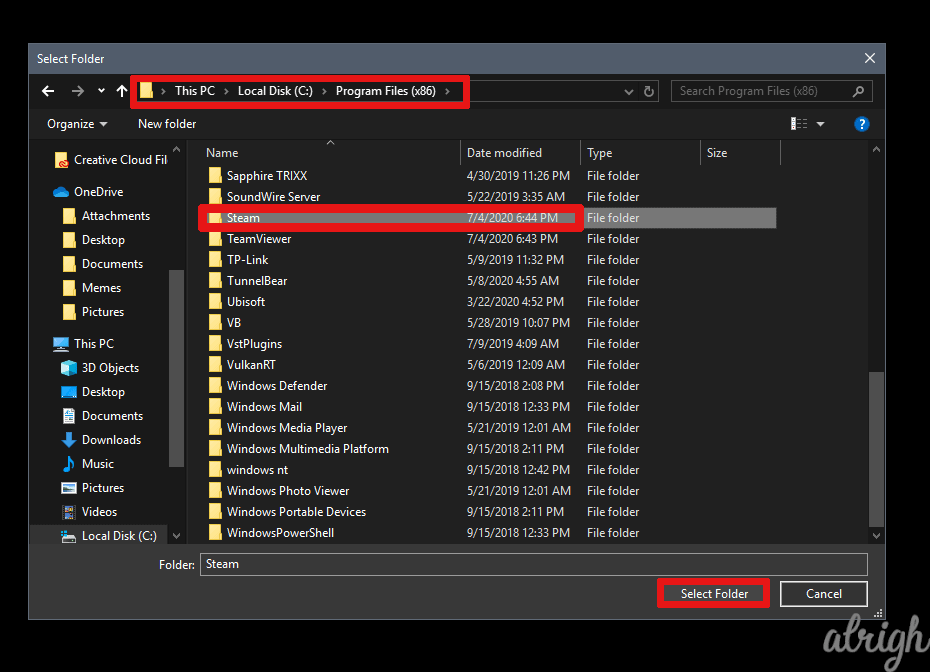
- Select the Steam folder and then click on Select Folder.
This will whitelist the steam folder, so the Window’s anti-virus service can’t intervene with VAC.
VAC Was Unable to Verify the Game Session Q&A
What does it mean when VAC was unable to verify your game session?
This is a bug that CSGO players have been dealing with for years. The good news is, if you’re seeing this, VAC has not banned you. The bad news is, there’s not much you can do to permanently fix this bug. Most users have reported that every fix works temporarily and then it goes back to showing the bug.
What is VAC?
VAC or Valve Anti-Cheat is an anti-cheat software developed by Valve in 2002. The software is used to detect the integrity of game files to see if anything has been altered.
How do I fix VAC was unable to verify my game session?
To fix this bug, you can try these different solutions:
- Verify your Game files & then restart your PC
- Copy steamservices.dll to Common files
- Run Steam as an administrator
- Set launch option to -verify
- Repair the Steam Client with CMD
- Whitelist Steam from your anti-virus
Summing It Up
If you’ve reached the end of this article, I hope you were able to fix the VAC bug on CSGO. If you weren’t able to fix it, leave a comment down below, and we’ll look into it.
If you used an alternative method to fix this bug, let us know in the comment section below, and we’ll add that to this article.