Data error (cyclic redundancy check). What could this possibly mean? Is the data on your hard disk/optical disk lost? I’ll answer all those questions, and help you gain access to your hard drive.
Contents
What is a Cyclic Redundancy Check?
But before we get into that, you must be wondering, “what even is a Cyclic Redundancy Check (CRC)?” Simply put, a cyclic redundancy check is a technique used to detect accidental changes in RAW computer data. It is commonly used in digital telecommunications networks and storage devices (in this case, hard drives/Optical disks).
What is the (Data Error) Cyclic Redundancy Check?
So then, what does data error (cyclic redundancy check) mean? It means CRC has detected an error in the hard disk. This can be anything from a bad sector to an unsuccessful software installation. This can also be caused if there is physical damage on a Hard disk/optical drive or if Windows files are missing or corrupted. There’s not much you can do to prevent this error from happening.
How to Recover Data from an Inaccessible Hard Drive/DVD?
Before you try to fix this error, it would be wise to recover as much data as you can. There is a very good chance that you’ll lose all your data while fixing the data error (Cyclic Redundancy Check).
So then, how do you recover data from an inaccessible drive? There are a bunch of software out there that claim to recover data from inaccessible disks. Although I cannot attest to this, most of these software programs have positive reviews.
Tool 1 – MiniTool Data Recovery Software
The first tool on this list is the MiniTool Data Recovery Software. You can use the MiniTool data recovery software to scan the inaccessible hard disk to see if any data is recoverable.
You will have to pay USD 69 per month to recover the data, which is definitely not cheap! But if the hard disk has important data, it could be a price you’re willing to pay.
Tool 2 – EaseUS Data Recovery Wizard
The second tool on this list is the EaseUS Data Recovery Wizard. You can use the EaseUS tool to recover data from an inaccessible hard drive or recover files removed via command lines on the command prompt. From what I can see, you’ll be able to recover 2GB of data for free, but you’ll have to pay for the premium version to recover anything more than that.
Tool 3 – Remo Data Recovery Software
The third data recovery tool on this list is Remo Recover. You can recover more than 500 types of files from any internal and external hard drive that is inaccessible or has gotten corrupted.
Remo Recover offers a one-month license for $79.97 and a lifetime license for $199.97. They also have a free version that can recover up to 1 GB of data from an inaccessible hard drive for free.
How to Solve the Data Error Cyclic Redundancy Check Problem?
Now that we’ve understood what the error means let’s get into the various ways to fix this error.
Fix 1 – Fix the Data Error (CRC) with Windows CHKDSK Utility
The CHKDSK (Check Disk) utility can be used to check and mark bad sectors in the drive. Once CHKDSK marks the bad sectors, the drive will become accessible.
Follow these steps to find and mark bad sectors with the Windows CHKDSK utility:
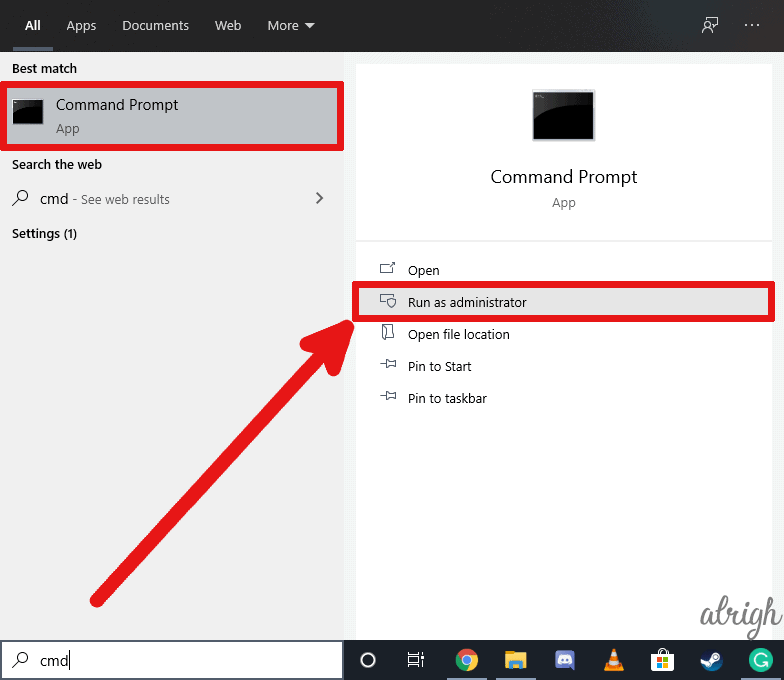
- Press the Windows Key to access the start menu.
- Type in “Command Prompt” and click on “Run as administrator”.

- Now, in the command line, type “CHKDSK X: /r” and then press Enter.
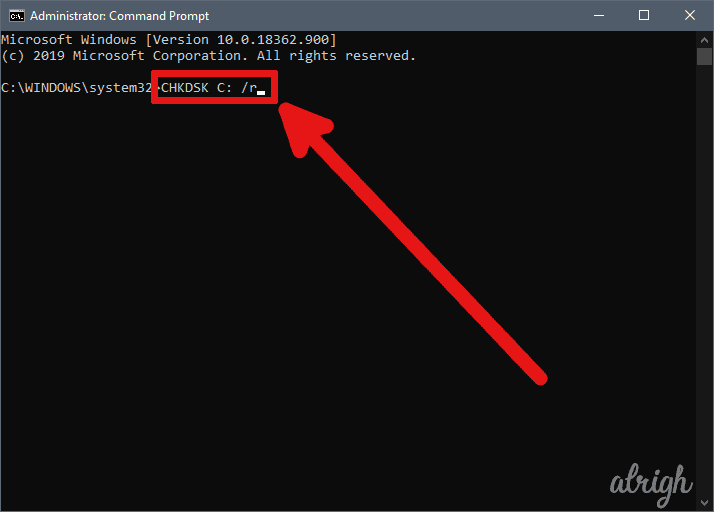
Make sure to replace X with the letter of your drive.
The /r parameter locates bad sectors and recovers readable information. This can get rid of any data errors and help you pass the cyclic redundancy check.
After the CHKDSK utility completes scanning, you can restart your PC to see if the hard disk is still inaccessible and if the CRC error is gone.
Fix 2 – Fix the Data Error (CRC) with SFC Utility
SFC stands for System File Check. SFC is a Windows inbuilt utility used to find and fix corrupted and missing files.
As discussed earlier, the CRC error can be caused because of corrupted or missing files. To ensure that’s not the case, we can run the SFC utility.
To run the SFC utility, follow these steps:
- Press the Windows Key to access the start menu.
- Type in, “Command Prompt” and click on “Run as administrator”.

- This will open CMD as an administrator.
- Now, in the command line, type “sfc /scannow”
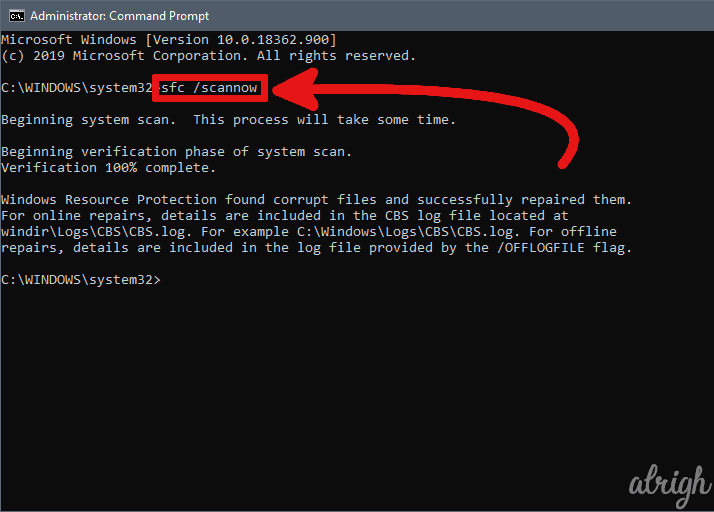
This will scan all Windows files for errors and replace the corrupted files.
If a corrupted file was the cause of the Cyclic Redundancy Check error, after the SFC scan, your hard drive should be accessible.
Fix 3 – Format the Disk with Diskpart
If all else fails, you can try to format the hard disk. Keep in mind, you will lose all data in the hard disk when you format it.
There are many ways you can format a hard disk.
Here is how you can format a hard drive with command prompt:
- Press the Windows Key to access the start menu.
- Type in “Command Prompt” and click on “Run as administrator”.
- This will open CMD as an administrator.
- Now, type “Diskpart” and press Enter.
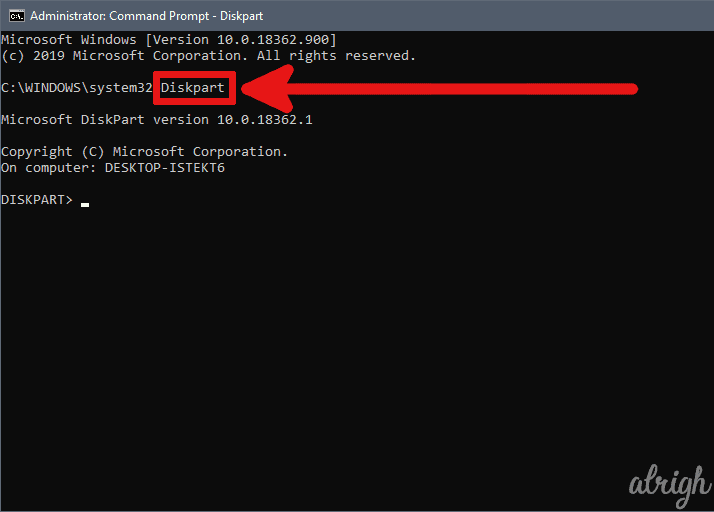
- Once the Diskpart window opens, type “list disk”.
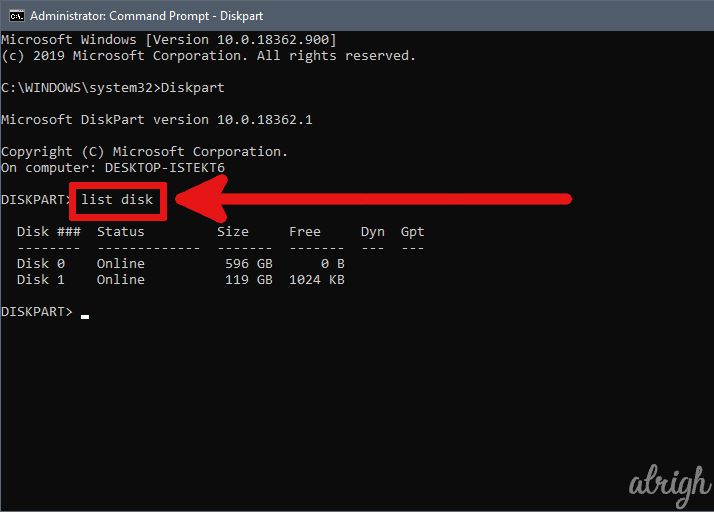
- This command will show you all available drives.
- Now type, “select disk (disk number)”. Mention the number of the problematic hard disk.
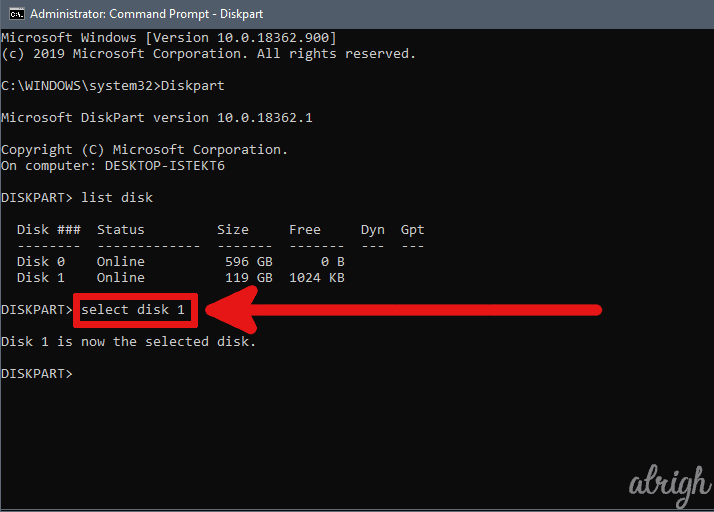
- Now type, “clean”. This will permanently delete all data on the hard drive.
- Now to make a partition, type “create partition primary”.
- To Format the drive, type “format fs=ntfs”
- Finally, type “assign” to assign a drive letter to the hard disk.
With this, you can easily format the hard disk and have it as good as new. This will (hopefully) help you get rid of the data error (Cyclic Redundancy Check).
Fix 4 – Use HDDScan to fix CRC error
Some people have also reported that the free software called HDDScan, has helped them clean their hard disk and get rid of the CRC error. You can try to use this software too.
You can download the software here.
Follow these steps to erase your Hard drive using HDDScan:
- Open the HDDScan application.
- Select the problematic HDD from the drop-down list.
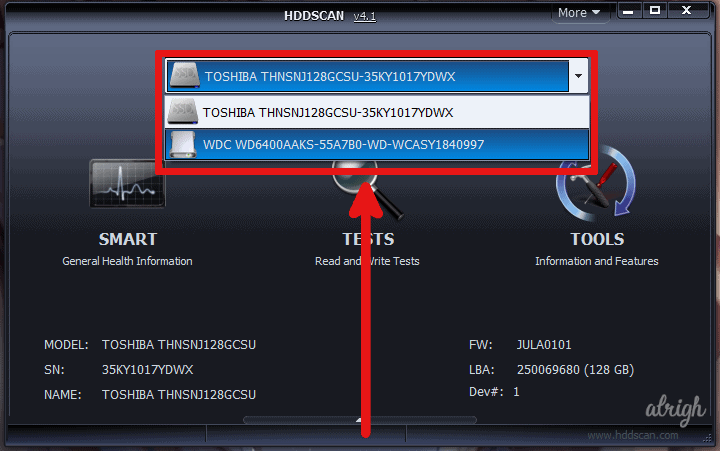
- Click on the SMART button. This will give you a detailed health report of the drive.
- Exit the SMART Window.
- Now, click on TESTS and then click on ERASE.
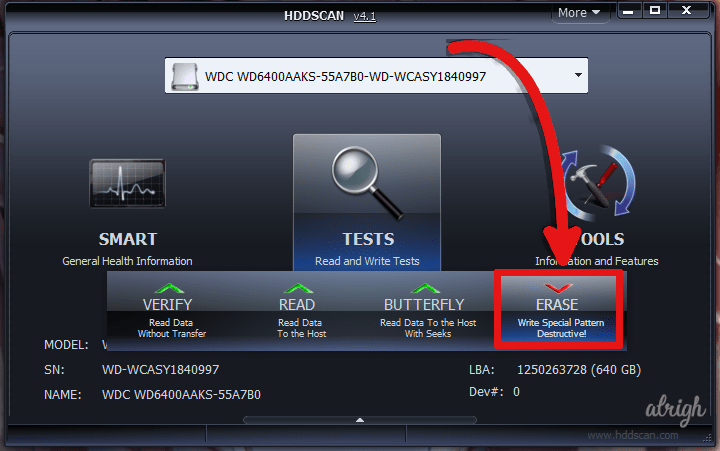
- Leave the values on the default settings, and click on the blue arrow on the right.
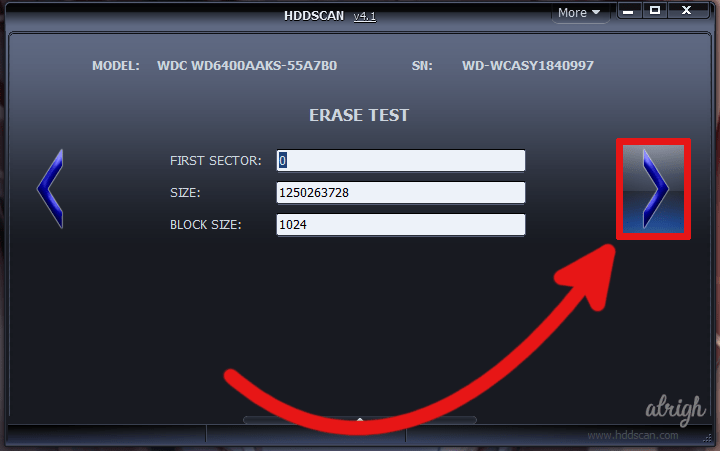
- A window will open and ask you if you want to erase the disk. Click on Yes.
- Now, click on the arrow at the bottom to see if HDD is erasing the data.
- This might take multiple hours.
- Once you’ve erased the drive, you can create partitions in the drive and assign a letter to it. (refer to method 3)
Fix 5 – Get Professional Help
If none of the above fixes work, you might want to consider sending in your drive for recovery and repair. Hopefully, in that case, you might be able to recover some of your data.
You can consider browsing Yelp or any of your local directories for professionals who can help you recover your data.
Data Error (Cyclic Redundancy Check) FAQs
Can I fix data error (cyclic redundancy check) on a DVD/CD?
In most cases, no. CRC errors in DVDs/CDs happen due to damage to the optical drive. But some people have reported Roadkil’s Unstoppable Copier has helped them recover data from their disk. You can get it from this link.
How can I prevent data error (cyclic redundancy check)?
You can’t. There’s not much you can do to prevent it, other than pray that you don’t get to see it ever again. One thing you should keep in mind is, if you see it on a drive once, it might occur in the future again. So, after fixing it, I wouldn’t trust the hard drive.
Conclusion
The CRC error is one of the nastiest errors you can run into on your PC. It means you could potentially lose your data. If you’re lucky, you might be able to recover some of it.
I hope this article helped you fix your hard drive. And I hope you never have to see this error ever again. If you have any questions, leave them in the comment section below and we’ll look into it.